
Delicious Taco Ranch Party Bites Recipe for Your Next Gathering

Taco Ranch Party Bites are the life of any gathering, bursting with vibrant flavors that dance around your taste buds and leave your guests begging for more. Picture this: the satisfying crunch of tortilla chips meets the savory bliss of perfectly seasoned beef, topped with a gooey layer of cheddar cheese that pulls like a warm hug. These bite-sized delights not only look amazing on the platter but also promise a flavor explosion that could make even the pickiest eaters smile. Imagine hosting a game day, birthday bash, or just a cozy weeknight dinner, and you’re pulling out these beautiful Taco Ranch Party Bites. The aroma of seasoned beef simmering mingling with the scent of melty cheese creates an irresistible invitation to dig in. Trust me, when you serve these at your next event, jaws will drop, and you’ll be crowned the undisputed snack champion. Ingredients for Taco Ranch Party Bites Here’s what you’ll need to make this delicious Taco Ranch Party Bites: 1 pound lean ground beef – Choose grass-fed for a richer flavor, or use a plant-based alternative for a vegetarian option. 1 oz taco seasoning – A delightful mix of spices that gives the beef its characteristic taste; feel free to adjust based on your heat preference. 10 oz diced tomatoes and green chiles (undrained) – Use fire-roasted tomatoes for a smoky depth of flavor or any canned variety for convenience. 2 cups shredded cheddar cheese – Opt for sharp cheddar for a bold taste, or use a cheese blend for extra creaminess. How to Make Taco Ranch Party Bites Follow these simple steps to prepare this delicious Taco Ranch Party Bites: Step 1: Brown the Beef In a large skillet over medium heat, cook the ground beef until it’s browned evenly, creating that delicious savory base. Once browned, drain any excess fat to keep the bites nice and light. Step 2: Mix in the Flavors Stir in the taco seasoning along with the diced tomatoes and green chiles. Simmer the mixture for about 5 minutes, allowing the flavors to meld together into a mouthwatering filling. Step 3: Preheat Your Oven While your beef mixture simmers away, preheat your oven to 350°F (175°C). This step is crucial to achieve that perfect cheesy finish. Step 4: Assemble the Bites Spoon the beef mixture into bite-size containers or a baking dish, making sure to evenly distribute it. Top each portion generously with shredded cheddar cheese, ensuring that every bite is a cheesy delight. Step 5: Bake to Perfection Place the assembled Taco Ranch Party Bites in the preheated oven and bake for about 20 minutes. The cheese should melt into a bubbly golden layer that makes your mouth water. Step 6: Serve and Enjoy! Once they’re hot and bubbly, take them out of the oven and let them cool for a minute. Serve warm with your favorite dipping sauces like salsa or guacamole for extra flair. Trust me, your guests will adore you for this! These Taco Ranch Party Bites are not just another recipe; they’re an experience wrapped in a tasty package. With each bite, you’ll savor a delightful combination of textures and tastes that make every gathering a special occasion. Now, who’s ready to dig in? This showstopping Taco Ranch Party Bites delivers restaurant-quality results using simple ingredients you probably already have at home. The perfect balance of textures and flavors creates an unforgettable dining experience that will have everyone asking for seconds. Picture-perfect presentation with vibrant colors makes this dish absolutely Instagram-worthy and guaranteed to impress any dinner guest. Incredibly versatile recipe that works beautifully for weeknight dinners, meal prep, special occasions, or even outdoor entertaining sessions. Perfecting Taco Ranch Party Bites Cooking Process Start by browning the ground beef in the skillet, allowing it to caramelize for maximum flavor. While the beef cooks, preheat your oven, then mix in the seasonings and tomatoes, creating a savory base before layering on the cheese for delightful gooeyness. Add Your Touch to Taco Ranch Party Bites Feel free to switch up the protein by using ground turkey or chicken for a lighter option. You can also add black beans for extra fiber or spice things up with jalapeños for those who enjoy a little heat in their Taco Ranch Party Bites. Storing & Reheating Taco Ranch Party Bites Store leftover Taco Ranch Party Bites in an airtight container in the fridge for up to three days. To reheat, place them in the oven or microwave until heated through, ensuring that the cheese remains melty and delicious. I remember the first time I made Taco Ranch Party Bites for a gathering. The compliments kept rolling in, and I thought I might just have to start a taco-themed restaurant! Nothing beats seeing friends rave about a dish you whipped up with love and laughter. FAQs About Taco Ranch Party Bites What is Taco Ranch Party Bites? Taco Ranch Party Bites are a delightful and easy-to-make appetizer that brings all the beloved flavors of tacos right into a bite-size portion. Featuring seasoned ground beef, diced tomatoes, green chiles, and gooey melted cheese, this fun dish is perfect for parties, game nights, or even casual get-togethers. When baked to perfection, these party bites are sure to impress your friends and family with their satisfying taste and vibrant presentation. How can I customize my Taco Ranch Party Bites? One of the great things about Taco Ranch Party Bites is their versatility. You can easily customize the recipe to suit your preferences by using ground turkey or chicken instead of beef for a lighter option. Interested in adding fiber and texture? Toss in some black beans or corn. For a spicy kick, consider adding jalapeños or your favorite hot sauce—you can really make these bites your own! Can I make Taco Ranch Party Bites ahead of time? Absolutely! You can prepare the Taco Ranch Party Bites in advance, making them a great choice for busy hosting days. Simply assemble the bites and store
Delicious Ranch Taco Bites: Easy Recipe for Flavorful Snacks

The aroma of warm tortillas filled with savory ground beef, zesty ranch dressing, and just the right amount of taco seasoning wafts through the air, instantly making your mouth water at the thought of these Ranch Taco Bites. These little bundles of joy are not just flavorful; they are easy to prepare and perfect for any gathering, from casual family dinners to lively parties with friends. Picture this: a fun evening with family and friends, laughter echoing in the background, and a spread of delightful snacks on the table. You reach for these Ranch Taco Bites, filled with melty cheese and a host of toppings, and suddenly, the evening transforms into a culinary fiesta. Their irresistible crunch and vibrant flavors promise an unforgettable dining experience, and you’ll definitely want seconds! Ingredients for Ranch Taco Bites Here’s what you’ll need to make this delicious Ranch Taco Bites: 12 pieces Flour Tortillas – Look for soft tortillas without any tears for the best wrap. 1 lb Ground Beef – Lean ground beef works best to keep it juicy without excess fat. 1 (10 oz) can Rotel – This adds a spicy kick with diced tomatoes and green chilies combined. ½ Cup Ranch – Use your favorite ranch dressing for a creamy and zesty flavor that binds everything. 3 tablespoons Homemade Taco Seasoning or 1 Packet of your favorite store brand – Homemade seasoning allows for customization. ½ teaspoon Sea Salt – Enhances all the flavors, so don’t skip it! ½ teaspoon Ground Black Pepper – Adds just the right amount of heat to balance the flavors. 1 teaspoon Minced Garlic – Fresh garlic brings an aromatic edge that elevates the dish. ½ teaspoon Onion Powder – Complements the garlic and beef for a savory depth. 1 Cup Shredded Cheese – A mix of cheddar and Monterey Jack melts beautifully and adds creaminess. For Serving: Salsa – Fresh salsa adds a vibrant twist. Sour Cream – The creamy texture balances the spiciness. Guacamole – Adds healthy fats and a creamy element. Shredded Lettuce – For crunch and freshness. Diced Jalapeno – Optional, for those who crave heat. Avocado – Optional creamy topping that enhances flavors. Diced Tomato – Provides a fresh burst of flavor. Lime Juice – A zesty drizzle to elevate everything. Fresh Cilantro – A sprinkle adds a fresh finish. How to Make Ranch Taco Bites Follow these simple steps to prepare this delicious Ranch Taco Bites: Step 1: Preheat Your Oven Preheat the oven to 350°F (175°C) to get it hot and ready for crispy goodness that awaits. Step 2: Cook the Ground Beef In a skillet over medium heat, brown the ground beef until fully cooked. Stirring occasionally, ensure it’s crumbled and golden for maximum flavor. Step 3: Mix in the Goodies Once your beef is browned, drain any excess fat and mix in the Rotel, ranch dressing, taco seasoning, sea salt, black pepper, minced garlic, and onion powder. Stir continuously until all the ingredients are combined perfectly. Step 4: Assemble the Taco Bites Spoon a generous amount of the beef mixture onto each flour tortilla, topping it with a sprinkle of shredded cheese. Roll each tortilla tightly and place them seam-side down on a lined baking sheet, ensuring they’re close but not touching—crispiness is key! Step 5: Bake to Perfection Pop the baking sheet in your preheated oven and bake for 15 minutes or until the tortillas are golden brown and crispy. Keep an eye on them to catch that perfect crunch! Step 6: Serve and Savor Once baked, remove from the oven and let them cool slightly. Serve these delicious Ranch Taco Bites with salsa, sour cream, guacamole, shredded lettuce, diced jalapeno, avocado, diced tomato, a squeeze of lime juice, and a sprinkle of fresh cilantro for the ultimate experience! Now that you have this fantastic recipe tucked away, get ready to impress friends or simply indulge in a delightful taco evening at home. Whether you’re spicing up a busy weeknight or hosting a weekend gathering, these Ranch Taco Bites will surely steal the show! Perfecting Ranch Taco Bites Cooking Process To create your Ranch Taco Bites efficiently, start by browning the ground beef till it’s perfectly cooked. Simultaneously, preheat your oven. Mix in the seasonings while waiting, ensuring maximum flavor, and prepare your tortillas as you roll them for baking. Add Your Touch to Ranch Taco Bites Feel free to customize your Ranch Taco Bites by swapping out ground beef for shredded chicken or turkey. Experiment with various cheeses like pepper jack for added heat or throw in some black beans for extra protein and texture. Storing & Reheating Ranch Taco Bites To store your Ranch Taco Bites, place them in an airtight container in the fridge for up to three days. For reheating, pop them in the oven at 350°F until warmed through for that crispy goodness, avoiding the microwave if possible. Sharing these Ranch Taco Bites with friends turned into an unforgettable potluck experience. Their smiles and empty plates said it all, and I knew I had created a hit. FAQs About Ranch Taco Bites What are Ranch Taco Bites? Ranch Taco Bites are delicious bite-sized snacks made with flour tortillas stuffed with a savory blend of ground beef, ranch dressing, and taco seasoning. These flavorful rolls are baked until golden brown and crispy, making them perfect for gatherings or as a quick dinner option. Topped with your favorite garnishes like salsa, guacamole, and fresh cilantro, Ranch Taco Bites are sure to impress your family and friends. They are not only easy to make but also customizable to suit various tastes. How can I customize Ranch Taco Bites? Customizing Ranch Taco Bites is simple and fun! You can swap the ground beef for shredded chicken, turkey, or even black beans for a vegetarian option. For added flavor, try different types of cheese, such as pepper jack for a spicy kick or a creamy cheese blend for richness. Feel free to load up on
Cheesy Spinach and Artichoke Pinwheels with Puff Pastry Recipe

Imagine biting into a warm, flaky layer of puff pastry that cradles an irresistible blend of cheesy goodness and vibrant greens. Our Cheesy Spinach and Artichoke Pinwheels with Puff Pastry Recipe offers an explosion of flavors that will make your taste buds sing. The creamy dairy-free cream cheese, coupled with seasoned spinach and artichokes, creates a heavenly filling that is both comforting and totally snack-worthy. Trust me, your kitchen will smell divine as these pinwheels bake to golden perfection. Now, let’s take a stroll down memory lane. I remember the first time I made these pinwheels for a family gathering. My aunt’s eyes widened in delight as I pulled them from the oven, the aroma wafting through the house like a warm hug. As we gathered around, jokes and laughter filled the air, and yesterday’s disappointments melted away with every bite. Whether for a cozy movie night, a fancy appetizer for a gathering, or a surprise treat after a long day, these pinwheels are always a hit. Get ready to be the star of your next gathering! Ingredients for Cheesy Spinach and Artichoke Pinwheels with Puff Pastry Recipe Here’s what you’ll need to make this delicious Cheesy Spinach and Artichoke Pinwheels with Puff Pastry Recipe: 1 sheet puff pastry – Make sure it’s thawed before use for easy rolling and maximum flakiness. Flour for dusting – A light sprinkle helps prevent the pastry from sticking to surfaces while you roll it out. 4 ounces dairy-free cream cheese – This adds a creamy texture to your filling; use your favorite brand for the best taste. 2 cloves garlic – Mince these for a punch of flavor that enhances the overall richness of the dish. 1 tablespoon nutritional yeast – This gives that cheesy flavor without dairy; a must-have for plant-based recipes. 1/4 teaspoon kosher salt – A small amount to bring out the flavors of the ingredients. 3 ounces frozen spinach – Be sure to thaw and drain well for the perfect consistency. 7 ounces canned artichoke hearts – Drain and chop these for a savory depth in every bite. 1/2 cup dairy-free mozzarella cheese – Meltable and stretchy, it makes the dish irresistibly gooey. How to Make Cheesy Spinach and Artichoke Pinwheels with Puff Pastry Recipe Follow these simple steps to prepare this delicious Cheesy Spinach and Artichoke Pinwheels with Puff Pastry Recipe: Step 1: Preheat Your Oven Set your oven to 400°F (200°C). While it heats, line a baking sheet with parchment paper for easy cleanup and perfectly crispy pinwheels. Step 2: Roll Out the Pastry On a lightly floured surface, roll out the puff pastry until it’s about a quarter-inch thick. This step is crucial for achieving that wonderful flakiness and creates a larger surface area for your filling. Step 3: Spread the Cream Cheese Take your softened dairy-free cream cheese and spread it evenly over the entire surface of the pastry. This creamy layer provides a delightful base for all the other tasty ingredients and locks in moisture. Step 4: Add the Flavorful Filling Sprinkle minced garlic, nutritional yeast, kosher salt, thawed spinach, chopped artichoke hearts, and dairy-free mozzarella cheese across the cream cheese layer. Make sure to distribute these evenly for a balanced explosion of flavor in every bite. Step 5: Roll and Slice Carefully roll the pastry tightly from one side to the other, forming a log. Slice this log into 12 equal pinwheels, and place them cut-side up on your prepared baking sheet. Each slice should reveal that beautiful, colorful filling. Step 6: Bake to Golden Perfection Pop those pinwheels into the oven, baking for about 18 minutes or until they are golden brown and crispy. You’ll want to keep an eye on them because, trust me, they will disappear quickly once out of the oven! Once they are out, allow them to cool slightly before serving. These delightful chewy bites are perfect for sharing, but feel free to keep a few for yourself because who could resist? Pair them with your favorite dip or enjoy them as is. Cooking is all about sharing love and happiness, and these Cheesy Spinach and Artichoke Pinwheels with Puff Pastry invite you to do just that. Whether it’s a family gathering, a cozy evening in, or a grand celebration, these little bundles of joy will bring smiles all around. Happy cooking! This showstopping Cheesy Spinach and Artichoke Pinwheels with Puff Pastry Recipe delivers restaurant-quality results using simple ingredients you probably already have at home. The perfect balance of textures and flavors creates an unforgettable dining experience that will have everyone asking for seconds. Picture-perfect presentation with vibrant colors makes this dish absolutely Instagram-worthy and guaranteed to impress any dinner guest. Incredibly versatile recipe that works beautifully for weeknight dinners, meal prep, special occasions, or even outdoor entertaining sessions. Perfecting Cheesy Spinach and Artichoke Pinwheels with Puff Pastry Recipe Cooking Process To achieve the best results with your Cheesy Spinach and Artichoke Pinwheels with Puff Pastry Recipe, start by prepping your ingredients while your oven preheats. Ensure the puff pastry is thawed before rolling it out, then layer your fillings for an even distribution of flavors. Add Your Touch to Cheesy Spinach and Artichoke Pinwheels with Puff Pastry Recipe Feel free to get creative with your Cheesy Spinach and Artichoke Pinwheels with Puff Pastry Recipe. You can swap the dairy-free cream cheese for regular cream cheese or add some sun-dried tomatoes for a burst of flavor. Consider playing with different spices, like red pepper flakes for a touch of heat. Storing & Reheating Cheesy Spinach and Artichoke Pinwheels with Puff Pastry Recipe To store your Cheesy Spinach and Artichoke Pinwheels, place them in an airtight container in the fridge for up to three days. When ready to enjoy again, reheat in a 350°F oven for about 10 minutes to regain their crispiness. A friend once told me that the best part of making these Cheesy Spinach and Artichoke Pinwheels was watching everyone’s faces as they took that
Crispy Frozen Roasted Broccoli Recipe for Perfectly Crunchy Veggies

Crispy Frozen Roasted Broccoli is a dish that takes the humble vegetable and turns it into pure comfort food magic. Imagine biting into perfectly roasted florets with a golden-brown, crispy exterior that contrasts beautifully with the tender inside. As you savor each mouthful, the sweetness from the caramelized edges dances delightfully on your palate, making every bite an irresistible treat. Plus, who can resist that tantalizing aroma wafting through your kitchen as the broccoli roasts, promising a flavor experience that’s both satisfying and wholesome? This crispy vegetable goodness isn’t just a side dish; it’s a versatile star that can elevate any meal. Whether you’re jazzing up a weeknight dinner or impressing guests at a feast, Crispy Frozen Roasted Broccoli fits the bill perfectly. It’s quick to prepare, and you can whip it up in just 25 minutes! So grab your baking sheet and your sense of adventure, and let’s dive into making this scrumptious dish. Ingredients for Crispy Frozen Roasted Broccoli Here’s what you’ll need to make this delicious Crispy Frozen Roasted Broccoli: 16 ounces frozen broccoli florets – Look for high-quality florets your grocery store offers. They should be vibrant green and free from excessive ice crystals. 1.5 tablespoons extra virgin olive oil – This adds a rich flavor and helps achieve that coveted crispiness. Feel free to substitute with avocado oil if you prefer. 0.5 teaspoon sugar – This balances the natural bitterness of broccoli, enhancing its sweetness during roasting. 0.5 teaspoon kosher salt – Essential for bringing out the flavors of the broccoli and other ingredients. 0.25 teaspoon ground black pepper – A touch of spice to elevate the taste profile of this dish. 1 pinch red pepper flakes – Adds a little kick; adjust the amount based on your heat preference. 1 small lemon (halved) – Freshly squeezed lemon juice brightens the flavors, making the dish refreshing and zesty. How to Make Crispy Frozen Roasted Broccoli Follow these simple steps to prepare this delicious Crispy Frozen Roasted Broccoli: Step 1: Preheat the Oven To kick things off, arrange one rack in the lower third of your oven and one in the upper third. Preheat your oven to a sizzling 450 degrees Fahrenheit. While it heats up, line a rimmed baking sheet with parchment paper. Pro tip: Make sure to place the baking sheet on the lower rack while the oven preheats for even cooking. Step 2: Prepare the Broccoli Grab a large mixing bowl and toss those frozen broccoli florets inside. Drizzle the olive oil over the greens, sprinkle the sugar, kosher salt, black pepper, and red pepper flakes, then toss them all together. Make sure that every floret is coated nicely. You want these bad boys to have flavor from top to bottom! Step 3: Roast the Broccoli Carefully remove that hot baking sheet from the oven once it’s preheated. Gently add the seasoned broccoli and spread it in an even layer, ensuring the flat sides of the florets are touching the pan. This little trick helps them caramelize beautifully! Step 4: Bake Until Crisp With the pan in place, return it to the lower rack of the oven. Bake for about 16 to 18 minutes until you see the broccoli starting to brown at the tips and edges. This is where the magic happens; all those flavors are coming together! Step 5: Broil for Extra Crispiness If you crave next-level crispiness (and really, who doesn’t?), switch your oven to broil! Move your baking sheet to the upper rack and let it broil for an additional 1 to 2 minutes. Just keep an eye on it to prevent any charred disasters; we want crispy, not charcoal! Step 6: Final Touches Once the broccoli looks perfect, remove it from the oven. Squeeze the juice from the halved lemon over the roasted veggies, allowing that zesty goodness to brighten everything up. Then, serve immediately while it’s still warm and all those delightful aromas waft through the air. Elevate this side dish into something spectacular by pairing it with your favorite main course or serving it as a standalone snack. You can even throw in some grated parmesan cheese or toasted nuts for added texture and flavor. Whatever you do, make sure to enjoy every crispy bite—you’ve earned it! This showstopping Crispy Frozen Roasted Broccoli delivers restaurant-quality results using simple ingredients you probably already have at home. The perfect balance of textures and flavors creates an unforgettable dining experience that will have everyone asking for seconds. Picture-perfect presentation with vibrant colors makes this dish absolutely Instagram-worthy and guaranteed to impress any dinner guest. Incredibly versatile recipe that works beautifully for weeknight dinners, meal prep, special occasions, or even outdoor entertaining sessions. Perfecting Crispy Frozen Roasted Broccoli Cooking Process To achieve crispy frozen roasted broccoli, start by preheating your oven and preparing the baking sheet while tossing the broccoli with oil and seasonings. With everything set, you’ll inch toward perfection in no time. Add Your Touch to Crispy Frozen Roasted Broccoli Consider customizing your crispy frozen roasted broccoli by using garlic powder, Parmesan cheese, or even a splash of balsamic vinegar to elevate the flavors. Mix in nuts or dried fruits for a delightful crunch and extra flair. Storing & Reheating Crispy Frozen Roasted Broccoli For optimal results, store leftover crispy frozen roasted broccoli in an airtight container in the fridge for up to three days. Reheat on a baking sheet in the oven to maintain that glorious crunch. Every time I make this crispy frozen roasted broccoli, my family lights up like it’s a holiday. They can’t believe frozen veggies can taste this good, and I love it when my kids ask for seconds! FAQs About Crispy Frozen Roasted Broccoli What is Crispy Frozen Roasted Broccoli? Crispy Frozen Roasted Broccoli is a delightfully easy dish that transforms frozen broccoli florets into a crunchy, flavorful vegetable side. By roasting the broccoli at a high temperature, you allow the natural sugars to caramelize, enhancing its flavor and creating a
Deliciously Crispy Curly Fries Recipe You Can Make at Home

Imagine biting into a crispy, golden curly fry, the aroma of seasoned perfection wafting through the air. The joy of homemade curly fries takes you back to those blissful days at the local diner, where you’d share laughter and stories with friends while devouring these delightful spirals of potato goodness. Let’s be honest: there’s nothing like the crunch of a perfectly fried curly fry to make your day a little brighter. This easy recipe for curly fries will not only satisfy your cravings but also elevate your cooking game right in the comfort of your home. Whether it’s game day, a casual get-together, or just because you’ve earned a treat after a long week, these curly fries are the perfect sidekick for any occasion. With a flavor profile that dances on your taste buds and an irresistible crunch, you’ll wonder why you ever settled for store-bought fries. Get ready to dive into the world of crispy, curly deliciousness! Ingredients for Curly Fries Here’s what you’ll need to make this delicious Curly Fries: 1 large russet potato (about 1 pound) – Scrubbed and unpeeled, it provides the perfect balance of starchy goodness and crispiness. 1.5 to 2 cups water – Just enough for soaking the potato, ensuring your curls stay fabulous. 28 ounces vegetable oil or canola oil – Essential for frying the curly fries to golden perfection; choose your favorite frying oil. 1.5 cups all-purpose flour – Acts as the base for the crispy coating that gives the fries their crunch. 0.25 cups paprika – Adds a warm, smoky flavor and a delightful color to your fries. 1.5 teaspoons cayenne pepper – Optional for those who like a little kick, enhancing the flavor profile with a spicy twist. 1.5 teaspoons garlic powder – Infuses the fries with a savory aroma that’s simply irresistible. 1.5 teaspoons onion powder – Complements the garlic with its sweet and savory taste. 1 tablespoon salt – Balances the flavors beautifully, ensuring every bite is seasoned just right. 1.5 teaspoons freshly ground black pepper – Adds a touch of warmth and further enhances the flavor. How to Make Curly Fries Follow these simple steps to prepare this delicious Curly Fries: Step 1: Soak the Potato Begin by soaking the potato in water for at least 30 minutes. This step helps soften the potato and keeps it from turning brown while you prepare the rest of your ingredients. Step 2: Heat the Oil Heat the vegetable oil in a deep fryer or a large pot until it reaches 375°F (190°C). A thermometer works wonders here to ensure the oil is at the perfect temperature for frying, which is key for that crunchy texture. Step 3: Prepare the Seasoned Coating In a mixing bowl, combine the flour, paprika, cayenne pepper (if using), garlic powder, onion powder, salt, and black pepper. This delightful blend will give your curly fries their signature flavor. Step 4: Cut the Potato Remove the potato from the water, drying it thoroughly. Using a spiralizer, cut the potato into curly fries. Time to work those biceps! Creating beautiful spirals is part of the fun, and they will be the stars of your snack-time showdown. Step 5: Dredge in Seasoning Take the curly potato spirals and dredge them in your prepared flour mixture. Make sure each fry is well coated to achieve that irresistible crunch when they fry. Step 6: Fry the Curly Fries Fry the curly fries in batches until they’re golden brown and crispy, which should take about 3-5 minutes per batch. Resist the urge to overcrowd the pot; giving them space allows each fry to fry evenly and achieve that perfect crunch. Finish up by removing the curly fries from the oil and draining them on paper towels. Serve hot with your favorite dipping sauces for the ultimate indulgence, and watch your friends and family devour these glorious spirals! Perfecting Curly Fries Cooking Process Begin by soaking the potato to enhance crispiness. Prepare your oil while the potato soaks, then cut the potato into curls. Dredge, fry, and enjoy deliciously crunchy curly fries in no time. Add Your Touch to Curly Fries Feel free to experiment with a variety of seasonings like ranch powder, cheese dust, or garlic herbs to make these curly fries uniquely yours. You can swap paprika for smoked paprika for an added depth of flavor. Storing & Reheating Curly Fries Store leftover curly fries in an airtight container in the fridge for up to two days. To reheat, place them in a hot oven for around 10 minutes, ensuring they return to their crispy glory. It was one of those cozy Saturday nights when friends gathered around with a spread of snacks, and I decided to whip up curly fries. They disappeared faster than I could fry them, each curl sparking joy and laughter. FAQs About Curly Fries What is Curly Fries? Curly fries are a fun and flavorful twist on traditional French fries. They are made by spiraling a potato into curly shapes and frying them until golden brown and crispy. Often seasoned with various spices, curly fries provide a unique texture and taste that elevate them above regular fries. They usually come with a delightful crunch outside, while still being fluffy on the inside. Whether enjoyed with a meal or as a snack, these crispy delights are loved by many. How do I make curly fries crispy? The secret to perfectly crispy curly fries lies in soaking the cut potatoes. Soak the potato spirals in water for at least 30 minutes; this process removes excess starch. Additionally, make sure to dry them thoroughly before dredging in the seasoned flour mixture. The oil temperature must be around 375°F (190°C) when frying to ensure a crispy exterior while keeping the insides fluffy. Always avoid overcrowding the frying pot, as this can lower the oil temperature and result in soggy fries. Can I customize the seasoning for curly fries? Absolutely! One of the best things about curly fries is
Crispy Homemade Onion Rings Recipe for Irresistible Snacking
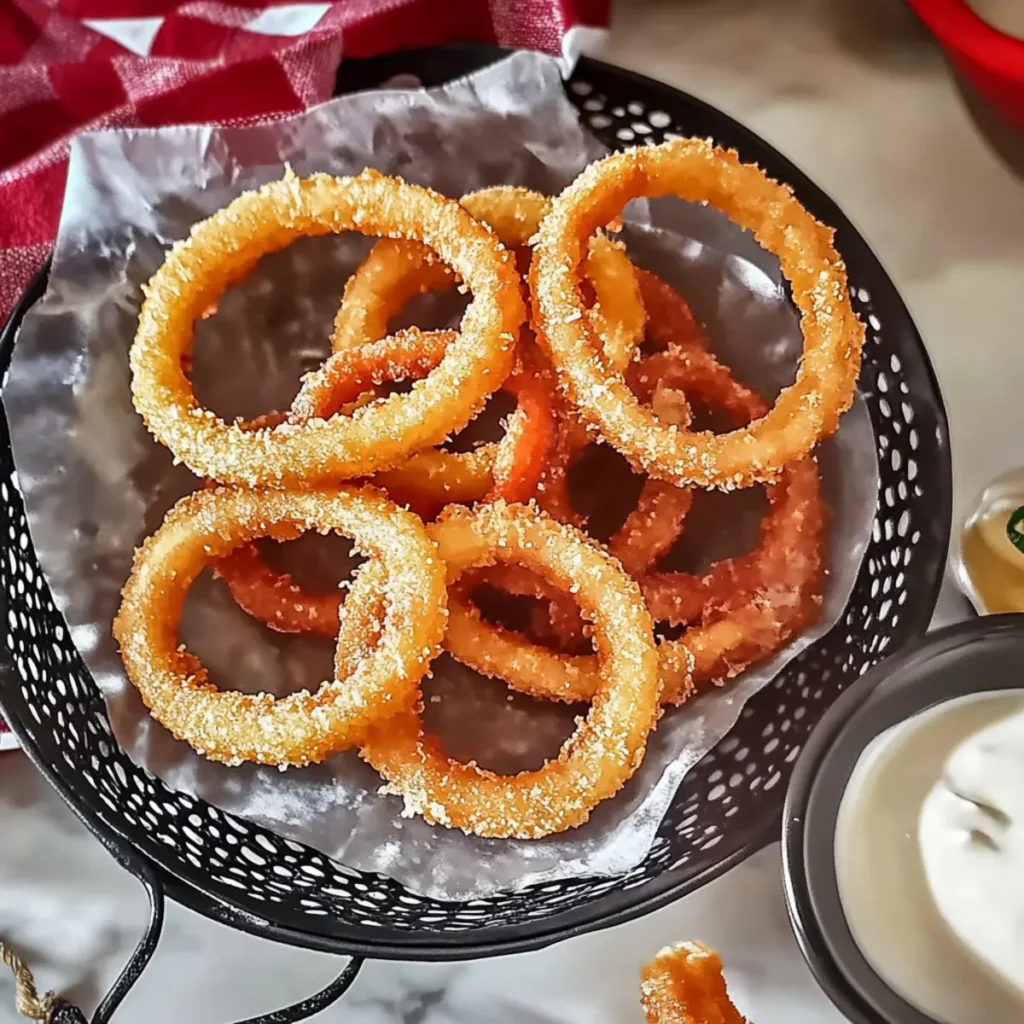
Indulging in crispy homemade onion rings isn’t just snacking; it’s a full-blown celebration of flavor, crunch, and nostalgia. Picture this: golden, battered rings floating in your fryer, crackling with joy as they await their moment to shine. Crispy homemade onion rings recipe for irresistible snacking is not only a crowd-pleaser but also a foolproof method to elevate your snack game. Remember biting into your favorite diner’s onion rings, the tantalizing aroma hitting your senses? Well, now you can recreate that blissful experience right in your kitchen! Whether you’re hosting friends for game night or just treating yourself to a delicious afternoon snack, these crispy delights are guaranteed to impress. You won’t just want a plate; you’ll need a second helping! Ingredients for Crispy Homemade Onion Rings Recipe for Irresistible Snacking Here’s what you’ll need to make this delicious Crispy Homemade Onion Rings Recipe for Irresistible Snacking: 1 quart of oil for frying – Choose a neutral oil like vegetable or canola, which has a high smoke point ideal for frying. 1 ¼ cups all-purpose flour – The backbone of your batter; it creates a crisp coating that’s essential for that perfect crunch. 1 teaspoon baking powder – This ingredient helps to create a light and airy texture in the batter. 1 teaspoon salt – A must to enhance the flavors; feel free to adjust according to your taste preference. 1 cup milk – Use whole milk for a richer, creamier coating that clings beautifully to the onions. 1 large egg – Acts as a binding agent, helping the flour and milk stick to the onion slices. ¾ cup dry bread crumbs – These add a wonderfully crispy texture on the outside of your onion rings. ⅛ teaspoon seasoned salt – An optional final touch to enhance flavor; use it according to your taste. 1 large Vidalia onion – Sweet and tender, these onions are perfect for frying and offer a mild flavor that pairs wonderfully with the batter. How to Make Crispy Homemade Onion Rings Recipe for Irresistible Snacking Follow these simple steps to prepare this delicious Crispy Homemade Onion Rings Recipe for Irresistible Snacking: Step 1: Heat the Oil Start by heating the oil in a deep fryer or a large pot. You’ll want it to reach 350°F (175°C) for the perfect frying temperature. This is crucial for achieving that crispy texture. Step 2: Prepare the Batter In a mixing bowl, combine the flour, baking powder, and salt, mixing well to ensure even distribution. In another bowl, whisk together the milk and egg until fully combined. Step 3: Get the Onions Ready Slice your large Vidalia onion into rings. Aim for about ¼-inch thick slices, ensuring they are uniform for even cooking. You can separate the rings gently with your fingers. Step 4: Dip and Coat Take each onion slice and dip it into the flour mixture first, covering it lightly. Then, move it to the milk and egg mixture for a good soaking. Finally, coat it thoroughly with dry bread crumbs, ensuring every surface is well covered. Step 5: Fry the Onion Rings Carefully place the coated rings into the hot oil, being cautious not to overcrowd the pot. Fry them until they turn a glorious golden brown, about 3 minutes per batch. Step 6: Drain and Season Remove the onion rings with a slotted spoon and place them on paper towels to drain excess oil. While they are still warm, sprinkle seasoned salt on top if desired for an extra flavor kick. Now, gather around your plate of crispy homemade onion rings, dip them in your favorite sauce, and enjoy the ultimate snack experience! Whether it’s a game night or a cozy movie marathon, these rings are bound to steal the show! Perfecting Crispy Homemade Onion Rings Recipe for Irresistible Snacking Cooking Process Start by heating the oil while you prepare the batter, mixing the flour, baking powder, and salt in one bowl and whisking the milk and egg in another. This way, everything stays efficient, and you can fry those onion rings to crispy perfection without missing a beat. Add Your Touch to Crispy Homemade Onion Rings Recipe for Irresistible Snacking Feel free to play with seasonings by adding garlic powder, paprika, or even some chili flakes for a spicy kick. You can also substitute the Vidalia onion with other varieties like red or yellow for different flavors and textures. Storing & Reheating Crispy Homemade Onion Rings Recipe for Irresistible Snacking Store leftover onion rings in an airtight container in the fridge for up to three days. To reheat, toss them in an oven at 375 degrees Fahrenheit for about 10 minutes to restore their crispiness. Creating this dish always reminds me of the first time I made onion rings at a family gathering; the crispy crunch had everyone raving, and I felt like a culinary rockstar in the kitchen. FAQs About Crispy Homemade Onion Rings Recipe for Irresistible Snacking What is Crispy Homemade Onion Rings Recipe for Irresistible Snacking? Crispy Homemade Onion Rings Recipe for Irresistible Snacking is a delightful preparation that involves crispy, battered onion slices fried to golden perfection. This recipe is perfect for a variety of occasions, whether you’re enjoying a casual weeknight dinner, hosting friends for a game night, or serving as a side dish at a backyard barbecue. With just a few simple ingredients and straightforward steps, you can create an irresistible snack that everyone will love. What type of onions are best for making crispy onion rings? While you can use various onion types, sweet onions like Vidalia or Walla Walla are favorites for a reason. They provide a natural sweetness that contrasts beautifully with the crunchy coating. However, yellow onions are also excellent if you prefer a more robust flavor. Experimenting with red onions can also offer a unique twist on classic onion rings, giving them a vibrant color and distinct taste. How do you keep onion rings crispy after frying? To maintain the crispiness of your
Irresistible Homemade Mozzarella Sticks Recipe with Marinara Sauce

Irresistible Homemade Mozzarella Sticks Recipe with Marinara Sauce is a dish that quickly transports you to your favorite Italian restaurant, where the rich aroma of frying cheese mingles tantalizingly with the tangy scent of marinara. Just picture this: a gooey, stretchy cheese center wrapped in a crispy, golden-brown crust. As you take a bite, the satisfying crunch gives way to a warm, cheesy embrace that keeps you reaching for more. Now, let me tell you, these mozzarella sticks aren’t just an appetizer; they can make any gathering feel like a celebration. Whoever said comfort food can’t be fancy has never had a plate of these beauties in front of them. Whether it’s movie night with friends, game day with your family, or just plain indulgence after a long day, this Irresistible Homemade Mozzarella Sticks Recipe with Marinara Sauce will elevate your snacking game like nothing else. Ingredients for Irresistible Homemade Mozzarella Sticks Recipe with Marinara Sauce Here’s what you’ll need to make this delicious Irresistible Homemade Mozzarella Sticks Recipe with Marinara Sauce: 1.5 cups Panko – These Japanese-style breadcrumbs add an extra crunch that regular breadcrumbs just can’t compete with. 0.5 teaspoon Italian seasoning – This blend of herbs brings a burst of flavor that perfectly complements the cheese. 0.5 teaspoon dried parsley – A sprinkle of parsley not only enhances flavor but also adds a pop of color. 0.25 teaspoon garlic powder – For that savory punch; garlic makes everything better! 0.5 teaspoon ground black pepper – This adds subtle heat and depth to the cheesy goodness. 0.25 teaspoon table salt – Just enough to make those flavors sing. 2 large eggs – These help bind the coating to the cheese sticks for a golden crust. 0.5 cups all-purpose flour – This is the first coat in our breadcrumbing adventure, ensuring everything sticks together beautifully. 1 lb whole milk mozzarella block or string cheese – The star of the show! Use a high-quality mozzarella for that perfect melt. Vegetable oil for frying – You’ll need enough for frying, so choose a neutral oil with a high smoke point for best results. Marinara sauce for dipping – A classic choice that balances the richness of the cheese with its tangy, fresh flavor. How to Make Irresistible Homemade Mozzarella Sticks Recipe with Marinara Sauce Follow these simple steps to prepare this delicious Irresistible Homemade Mozzarella Sticks Recipe with Marinara Sauce: Step 1: Set Up Your Breading Station Prepare a breading station by placing the Panko, Italian seasoning, dried parsley, garlic powder, ground black pepper, and table salt in one bowl. In a second bowl, beat the eggs and keep the flour in a third bowl. This assembly line will make the coating process a breeze. Step 2: Cut Your Cheese Taking your mozzarella block or string cheese, slice it into sticks that are about half an inch wide. You want them to be easy to handle and dip in marinara while still being generously cheesy. Step 3: Dredge and Coat Now, take each mozzarella stick and dredge it first in the flour, ensuring each piece is lightly coated. Next, dip it into the beaten eggs, letting the excess drip off. Finally, roll it in the Panko mixture until fully covered. This triple coating is the secret to achieving that epic crunch. Step 4: Heat the Oil In a large frying pan, heat enough vegetable oil over medium heat to cover the bottom. You want the oil hot enough that it begins to shimmer but not so hot that it smokes up your kitchen. Step 5: Fry Time! Carefully add the breaded mozzarella sticks to the hot oil in batches. Don’t overcrowd the pan, or they will steam instead of fry. Cook for about 3 minutes on each side or until they turn golden brown and scrumptious. Step 6: Drain and Serve Once golden, remove the mozzarella sticks and let them drain on paper towels. Serve them hot with a generous bowl of marinara sauce for dipping, and watch those cheesy strings stretch as you pull them apart. There you have it! These Irresistible Homemade Mozzarella Sticks Recipe with Marinara Sauce are the perfect mix of crunchy and gooey—you won’t be able to keep your hands off them. Perfect as a snack or appetizer, they’re sure to steal the show at your next gathering! Perfecting Irresistible Homemade Mozzarella Sticks Recipe with Marinara Sauce Cooking Process To make the most of your cooking time, set up your breading station first. This way, you can quickly coat each mozzarella stick and fry them while they’re fresh. Multitasking is key for efficiency—get that oil hot while you prepare the cheese! Add Your Touch to Irresistible Homemade Mozzarella Sticks Recipe with Marinara Sauce Feel free to get creative with your seasonings! Add a dash of cayenne for a spicy kick, or switch the Panko for crushed crackers for a different texture. You can even stuff the mozzarella sticks with jalapeños or herbs for an extra flavor surprise. Storing & Reheating Irresistible Homemade Mozzarella Sticks Recipe with Marinara Sauce To store your mozzarella sticks, let them cool completely, then place them in an airtight container. When you’re ready to enjoy them, reheat in a preheated oven at 350°F for about 10 minutes for that crispiness you love. It was a chilly Friday night when I first made these mozzarella sticks for game night with my friends. Their faces lit up with joy, and I can still hear my buddy exclaim, “These are better than the ones we get at the pub!” That moment cemented this recipe as a staple in my home. FAQs About Irresistible Homemade Mozzarella Sticks Recipe with Marinara Sauce What is Irresistible Homemade Mozzarella Sticks Recipe with Marinara Sauce? The Irresistible Homemade Mozzarella Sticks Recipe with Marinara Sauce is a delightful app that transforms simple ingredients into a mouthwatering treat. The sticks consist of gooey mozzarella cheese, breaded in a crisp coating made from Panko and spices. When served with rich marinara sauce
Ultimate Guacamole and Chips Recipe for Perfect Party Snacking
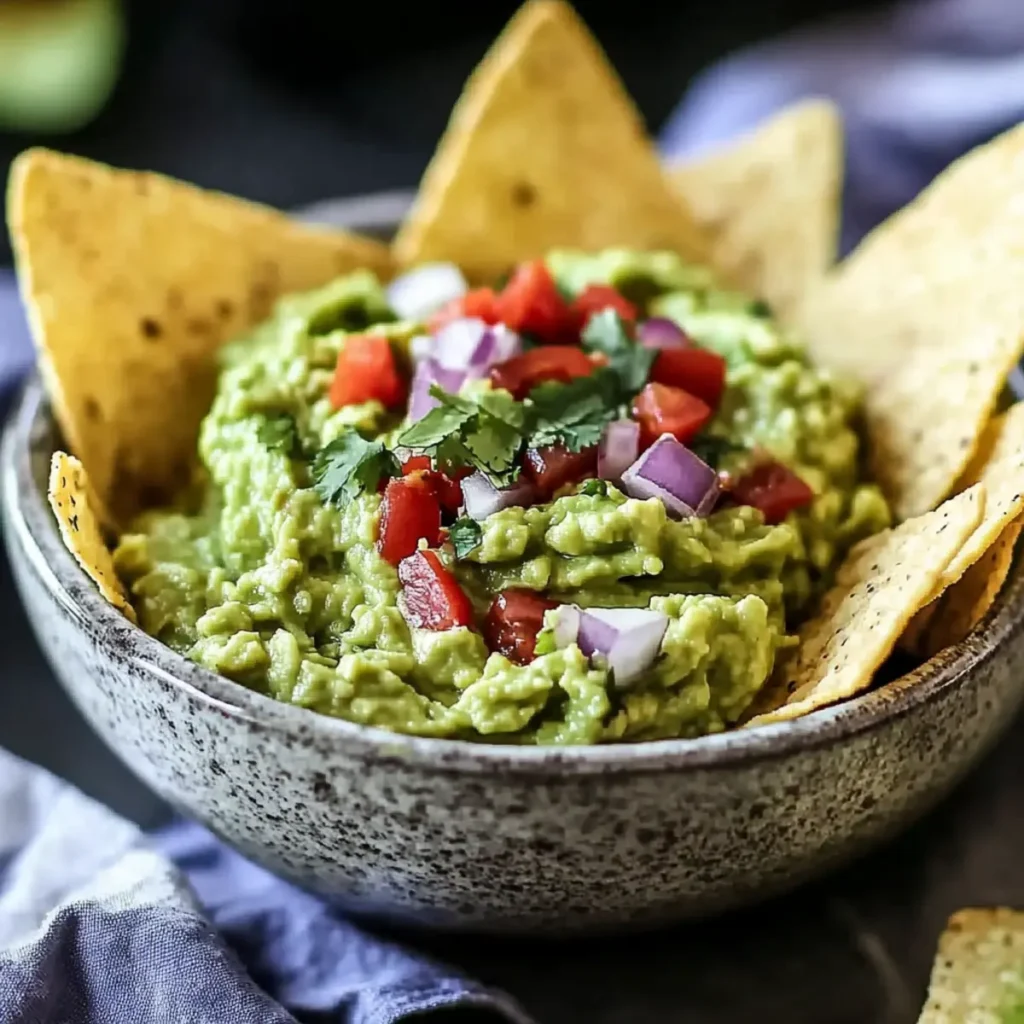
Ultimate Guacamole and Chips Recipe for Perfect Party Snacking is the kind of culinary masterpiece that makes your taste buds dance and your friends keep coming back for more. Imagine golden chips paired with a creamy, flavorful dip that makes every gathering feel like a fiesta. The freshness of ripe avocados mingling with zesty lime juice, robust garlic, and a little punch from jalapeños turns this dish into an irresistible party star. This mouthwatering combination not only looks stunning but is a breeze to whip up. Whether you’re hosting a casual get-together or planning a grand celebration, this Ultimate Guacamole and Chips Recipe for Perfect Party Snacking promises to elevate any occasion. You’ll see folks flocking to the snack table, eagerly experiencing that first delicious dip. Ingredients for Ultimate Guacamole and Chips Recipe for Perfect Party Snacking Here’s what you’ll need to make this delicious Ultimate Guacamole and Chips Recipe for Perfect Party Snacking: 1 jalapeño – Adds a spicy kick; choose one that’s bright and firm for the best flavor. 1/2 cup red onion – Offers a sweet and slightly tangy crunch; opt for a fresh, vibrant onion. 3 cloves garlic – Provides a savory depth; use fresh cloves for maximum flavor impact. 1/4 cup fresh cilantro – Gives a burst of freshness and enhances the overall taste; pick bright green leaves. 8 large avocados – Creamy and rich, the star of the show; select ones that yield slightly to pressure. 3 limes – Their zesty juice adds brightness; look for firm limes with a smooth skin. 1 1/2 teaspoons sea salt – Balances flavors and enhances overall taste; sea salt has a unique texture and flavor. 1/2 teaspoon black pepper – A staple seasoning that rounds out the other flavors beautifully. 1 1/2 teaspoons cumin – Provides an earthy depth; ground cumin is a must for this recipe. 1/2 cup cherry tomatoes – Adds color and a touch of sweetness; choose plump, juicy ones. How to Make Ultimate Guacamole and Chips Recipe for Perfect Party Snacking Follow these simple steps to prepare this delicious Ultimate Guacamole and Chips Recipe for Perfect Party Snacking: Step 1: Prepare the Vegetables Start by seeding and finely mincing the jalapeño. Dicing the red onion and mincing the garlic comes next. Don’t forget to finely chop the fresh cilantro; it’s time to make everything look and smell amazing! Step 2: Mash the Avocados Grab a big mixing bowl and mash those ripe avocados until they reach your desired consistency. Whether you like it smooth or a bit chunky, make it your own! Step 3: Juicing the Limes Juice the limes and add the tart, zesty juice to the mashed avocados. This not only prevents browning but also infuses the guacamole with bright citrus flavor – it’s a win-win. Step 4: Mix Everything Together Gently fold in the minced jalapeño, diced red onion, minced garlic, and chopped cilantro into the avocado mixture. Sprinkle in the sea salt, black pepper, and cumin for that extra flavor punch. Toss in the diced cherry tomatoes and give it one last stir. Step 5: Taste and Adjust Seasoning Now’s the moment of truth! Taste your guacamole and adjust the seasoning with more sea salt and black pepper if desired. Remember, you want it to sing with flavor. Step 6: Serve and Enjoy! Transfer your ultimate guacamole into a beautiful serving bowl, grab your favorite chips, and let the dipping commence! Whether it’s game day, casual get-together, or a delightful taco night, your guests will adore the fresh flavors and vibrant colors of this Ultimate Guacamole and Chips Recipe for Perfect Party Snacking. With each bite, they’ll be thanking you for bringing such a tasty creation to the table! This showstopping Ultimate Guacamole and Chips Recipe for Perfect Party Snacking delivers restaurant-quality results using simple ingredients you probably already have at home. The perfect balance of textures and flavors creates an unforgettable dining experience that will have everyone asking for seconds. Picture-perfect presentation with vibrant colors makes this dish absolutely Instagram-worthy and guaranteed to impress any dinner guest. Incredibly versatile recipe that works beautifully for weeknight dinners, meal prep, special occasions, or even outdoor entertaining sessions. Perfecting Ultimate Guacamole and Chips Recipe for Perfect Party Snacking Cooking Process Start by prepping your ingredients: finely mince jalapeño, garlic, and cilantro, then dice the red onion. Mash the avocados in a bowl before mixing in lime juice and seasonings, ensuring a harmonious blend of flavors throughout. Add Your Touch to Ultimate Guacamole and Chips Recipe for Perfect Party Snacking Feel free to customize this guacamole by swapping jalapeño for a milder pepper, adding diced mango for sweetness, or tossing in crumbled feta for a tangy twist. Get creative! Storing & Reheating Ultimate Guacamole and Chips Recipe for Perfect Party Snacking To store leftover guacamole, transfer it to an airtight container, pressing plastic wrap over the surface to minimize oxidation. Enjoy within two days for the best flavor and quality. Cooking this guacamole reminds me of a backyard barbecue where my friends devoured it so quickly, it felt like a magic trick! Their smiles and compliments made every effort worthwhile. FAQs About Ultimate Guacamole and Chips Recipe for Perfect Party Snacking What is Ultimate Guacamole and Chips Recipe for Perfect Party Snacking? The Ultimate Guacamole and Chips Recipe for Perfect Party Snacking is a vibrant and delicious dish featuring creamy avocados blended with fresh ingredients like jalapeño, cilantro, and lime juice. This easy-to-make dip pairs perfectly with crunchy tortilla chips and is a staple at gatherings. The balance of flavors and textures not only elevates your snack game but also makes it the star of any party. Whether for casual get-togethers or formal events, this guacamole is sure to impress every guest. How can I customize the Ultimate Guacamole and Chips Recipe for Perfect Party Snacking? Customization is key to making the Ultimate Guacamole and Chips Recipe for Perfect Party Snacking uniquely yours. Try swapping jalapeños for milder peppers if you
Delicious Chicken Stuffed Crescent Hearts for a Romantic Dinner

Making your way into the kitchen to whip up a batch of Chicken Stuffed Crescent Hearts is like getting ready to dive into a love story where the chicken is the hero and the crescent rolls are its cozy disguise. Imagine golden, flaky layers enfolding tender chicken that’s been harmoniously sweetened with a hint of red sugar. The aroma that fills the air while these delightful hearts bake will transport you straight to the Dinner of Your Dreams. Picture this: it’s a romantic evening, and you want to impress someone special without spending hours trapped in the kitchen. These Chicken Stuffed Crescent Hearts are not only quick and easy to make, they also deliver a memorable experience with every golden bite. Whether you’re celebrating love, friendship, or just indulging yourself on a weeknight, this dish guarantees that everyone will be coming back for seconds. Ingredients for Chicken Stuffed Crescent Hearts Here’s what you’ll need to make this delicious Chicken Stuffed Crescent Hearts: 3 tablespoons red sugar – This adds a unique sweetness that sets the filling apart from traditional savory dishes. 2 tablespoons butter or margarine, melted – Use unsalted butter for a richer flavor or margarine for a lighter option. 1 can (8 oz) refrigerated Pillsbury™ Original Crescent Rolls or Dough Sheet (8 Count) – The key to easy preparation, these rolls yield the perfect flaky texture and shape. How to Make Chicken Stuffed Crescent Hearts Follow these simple steps to prepare this delicious Chicken Stuffed Crescent Hearts: Step 1: Preheat the Oven Preheat your oven according to the crescent roll package instructions. This usually means setting it to a cozy 375°F (190°C). While it heats up, gather your tools: a baking sheet and a spatula will be your best friends in this endeavor. Step 2: Roll Out the Dough Unroll the crescent rolls or dough sheet onto a clean surface. Gently stretch out the triangles, ensuring they maintain their shape. You want every inch of that flaky goodness to be utilized! Step 3: Mix the Filling In a medium bowl, combine the melted butter and red sugar, mixing until fully blended. This mixture will act as a delightful glaze for the chicken, turning your hearts into a sweet and savory masterpiece. Step 4: Stuff the Crescents Take a generous spoonful of the chicken mixture and drop it onto the wider end of each crescent triangle. Be sure to leave enough space to fold the dough over securely. Step 5: Shape Into Hearts Carefully fold the outer edges of the crescent around the chicken filling, pinching the sides to seal in all the tasty juices. Start at the wider end and gently fold towards the tip to form a heart shape. Step 6: Bake to Perfection Place your Chicken Stuffed Crescent Hearts on a baking sheet and put them in the oven. Bake as directed on the crescent roll package, usually around 13 minutes, until they are beautifully golden brown. Transfer to plates and watch your loved ones light up! Preferably, serve them with a drizzle of sauce for that extra flair and flavor. Now, you have a delightful dish that is not just a treat for the taste buds, but also a visual feast! These Chicken Stuffed Crescent Hearts are versatile enough for any occasion. From cozy dinners with friends to elegant date nights, they’ll steal the show every time. And let’s be honest, who doesn’t love a homemade meal that looks this adorable? Get ready to make a lasting impression, and don’t forget the camera—these hearts demand to be captured in all their golden glory! Perfecting Chicken Stuffed Crescent Hearts Cooking Process Start by preheating your oven while you prepare your filling. Cook the chicken mixture first and roll out the crescent dough to ensure a smooth assembly process. This sequence keeps everything efficient for perfect results. Add Your Touch to Chicken Stuffed Crescent Hearts Feel free to sprinkle in your favorite herbs or use shredded cheese for extra flavor. Try adding spinach for a nutrient boost or swapping chicken for shredded pork or veggies for a delightful alternative. Storing & Reheating Chicken Stuffed Crescent Hearts Store any leftovers in an airtight container in the fridge for up to three days. Reheat in the oven at 350°F until heated through to keep that flaky texture intact. I remember the first time I made Chicken Stuffed Crescent Hearts for my friends. The look on their faces when they first took a bite was priceless, and I still hear about it at gatherings! FAQs About Chicken Stuffed Crescent Hearts What is Chicken Stuffed Crescent Hearts? Chicken Stuffed Crescent Hearts are delightful pastries made by filling crescent roll dough with a savory chicken mixture, shaped into heart forms for a charming presentation. This dish combines the flakiness of the crescent rolls with a rich, buttery filling that boasts a hint of sweetness from red sugar. They are perfect for romantic dinners, special occasions, or simply a cozy night in, elevating any meal with their adorable shape and delicious flavors. Can I customize the filling for Chicken Stuffed Crescent Hearts? Absolutely! One great thing about Chicken Stuffed Crescent Hearts is their versatility. You can jazz up the filling by adding your favorite herbs, cheeses, or even vegetables. For example, spinach and feta would create a delicious Mediterranean twist. If you’re in the mood for something different, you can swap out the chicken for shredded beef or roasted vegetables, allowing you to cater to various dietary preferences while maintaining that heartwarming vibe. How long does it take to make Chicken Stuffed Crescent Hearts? Making Chicken Stuffed Crescent Hearts is relatively quick! The prep time is about 45 minutes, which includes rolling out the dough and preparing the filling. Once assembled, they only need about 13 minutes in the oven. In total, you’re looking at around 75 minutes from start to finish. That means you can have an impressive dish ready in under an hour and a half, perfect for a spontaneous
Warm Avocado Spinach Soup Recipe with Refreshing Salsa Verde Delight
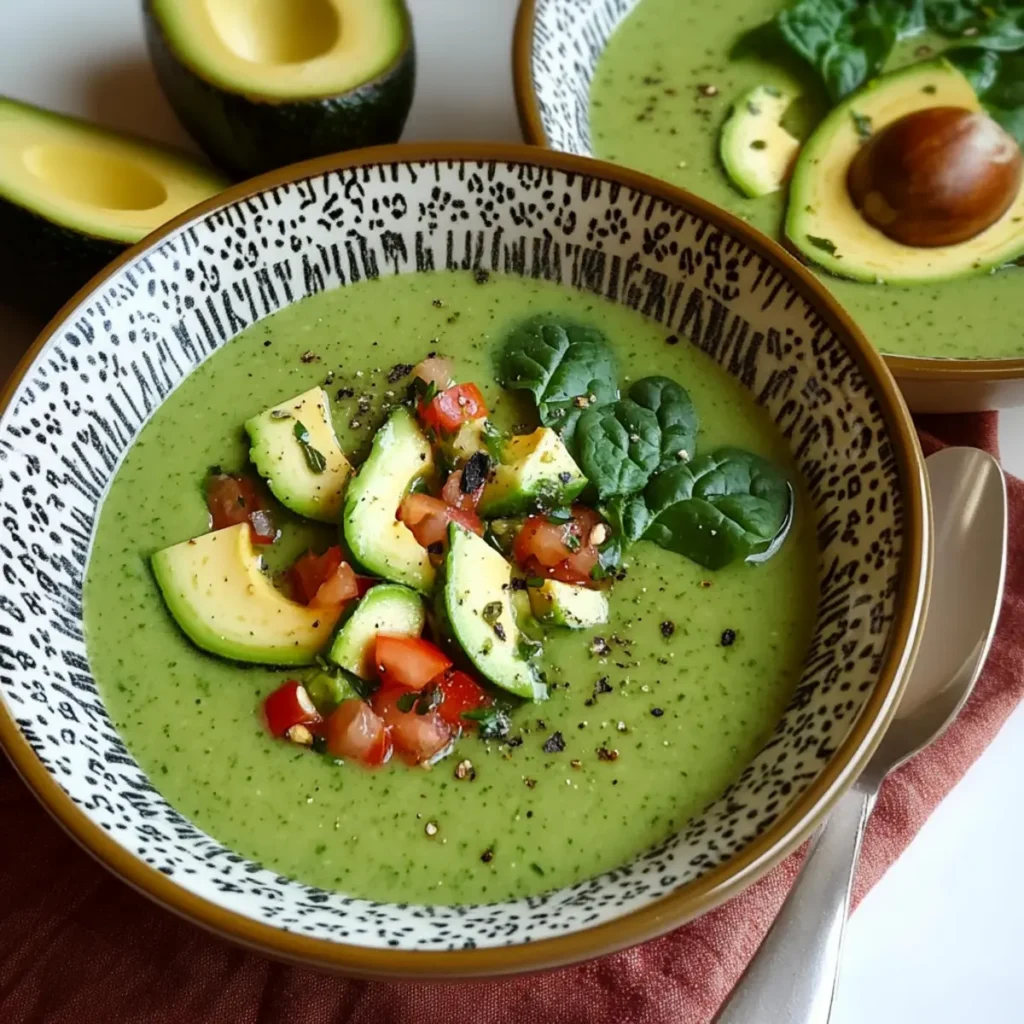
Warm Avocado Spinach Soup is a vibrant, heartwarming dish that brings together the creamy goodness of ripe avocados and the fresh, lively flavors of spinach and salsa verde. This delightful blend creates a warm, velvety texture that warms not only your stomach but also your spirit, making it perfect for any cozy gathering or a quick weeknight dinner. Imagine a chilly evening, your favorite cozy sweater on, and a bowl of this inviting soup in hand. With hints of lime dancing on your palate and the satisfying crunch of cucumber garnishing your bite, you are bound to fall in love with this Warm Avocado Spinach Soup Recipe with Refreshing Salsa Verde. So grab your favorite spoon and get comfortable; this soup is here to impress! Ingredients for Warm Avocado Spinach Soup Recipe with Refreshing Salsa Verde Here’s what you’ll need to make this delicious Warm Avocado Spinach Soup Recipe with Refreshing Salsa Verde: 2 ripe avocados – Selection is key; pick ones with smooth, unblemished skin that yield slightly to pressure. 3 cups baby spinach – Use fresh, vibrant spinach; wilted or yellowing leaves are a sign of age and won’t provide the same flavor or nutrition. 1/2 large English cucumber – Opt for a firm cucumber for a satisfying crunch; these cucumbers are also less bitter than other varieties. 3 stalks celery – Crisp and bright green stalks add a lovely texture and taste; discard any wilted or brown leaf ends. 2/3 cup bottled salsa verde – Look for a brand made with fresh ingredients for the best flavor; it adds zest without overwhelming heat. 1/4 cup freshly squeezed lime juice – Freshly squeezed is a must; bottled lime juice just won’t deliver the same bright taste. 1/2 teaspoon kosher salt – Use kosher salt for its fantastic flavor and ability to enhance the other ingredients nicely. 1 cup ice – This helps achieve that cold, refreshing temperature that makes this soup enjoyable. 1 cup cold water – Adjust water based on your preferred soup thickness; more water leads to a thinner soup. How to Make Warm Avocado Spinach Soup Recipe with Refreshing Salsa Verde Follow these simple steps to prepare this delicious Warm Avocado Spinach Soup Recipe with Refreshing Salsa Verde: Step 1: Prepare the Avocados Peel and pit the avocados, taking care to scoop out every delicious bit. Transfer one and a half avocados into your trusty food processor, while you chop the remaining half for a beautiful garnish later. Step 2: Add Your Fresh Ingredients Next, throw in the baby spinach, diced cucumber, diced celery, salsa verde, lime juice, salt, ice, and cold water into the food processor. This colorful array of ingredients is sure to make you feel invigorated! Step 3: Blend It All Together Process these fresh ingredients until they turn into a silky-smooth mixture. You might be tempted to taste test now, which is perfectly okay—just watch out for accidental spills of deliciousness! Step 4: Check the Seasoning Once blended, give your soup a taste. Don’t forget to season with more salt if needed; we all have different salt preferences, and you want it just right. Step 5: Serve and Garnish Pour the warm soup into bowls and artfully sprinkle the reserved diced cucumber and avocado on top for a pop of presentation. You could also drizzle a bit more lime juice for that extra zing. Step 6: Enjoy! Gather your loved ones around, serve your artfully presented soup, and prepare for compliments galore. This Warm Avocado Spinach Soup is a showstopper, ready to be enjoyed hot! Prepare to be amazed at how easy it is to whip up this delicious Warm Avocado Spinach Soup Recipe with Refreshing Salsa Verde. Not only is it enjoyable to eat, but it’s also fun to make and brings a delightful brightness to any meal! So why not add this sensational dish to your recipe rotation? Happy cooking! This showstopping Warm Avocado Spinach Soup Recipe with Refreshing Salsa Verde delivers restaurant-quality results using simple ingredients you probably already have at home. The perfect balance of textures and flavors creates an unforgettable dining experience that will have everyone asking for seconds. Picture-perfect presentation with vibrant colors makes this dish absolutely Instagram-worthy and guaranteed to impress any dinner guest. Incredibly versatile recipe that works beautifully for weeknight dinners, meal prep, special occasions, or even outdoor entertaining sessions. Perfecting Warm Avocado Spinach Soup Recipe with Refreshing Salsa Verde Cooking Process To create a beautifully blended soup, start by prepping all your ingredients. Begin with the avocados and then toss everything into the food processor in a sequence that maximizes smoothness, adding spinach and salsa verde for vibrant flavor. Add Your Touch to Warm Avocado Spinach Soup Recipe with Refreshing Salsa Verde For a personal twist, feel free to substitute Greek yogurt for a creamy element or add a handful of herbs like cilantro or basil for extra freshness. Experiment with spices, perhaps a hint of cayenne for heat, or even some roasted garlic for depth. Storing & Reheating Warm Avocado Spinach Soup Recipe with Refreshing Salsa Verde Store any leftover soup in an airtight container in the refrigerator for up to three days. When ready to enjoy, gently reheat on the stove over low heat, stirring frequently to preserve the creamy texture. Sometimes, making this soup has turned an ordinary weekday lunch into a special occasion. Friends have raved, and I’ve even become known as the “Avocado Whisperer” at gatherings because of how much they love this recipe. FAQs About Warm Avocado Spinach Soup Recipe with Refreshing Salsa Verde What is Warm Avocado Spinach Soup Recipe with Refreshing Salsa Verde? Warm Avocado Spinach Soup Recipe with Refreshing Salsa Verde is a delightful culinary creation that blends the creaminess of ripe avocados with the vibrant flavors of fresh spinach and zesty salsa verde. This soup is not only easy to prepare but also delivers refreshing taste and nourishment in every spoonful. It’s perfect for those looking for a healthy yet