
Quick and Easy Quinoa Instant Pot Recipe Perfect for Meal Prep
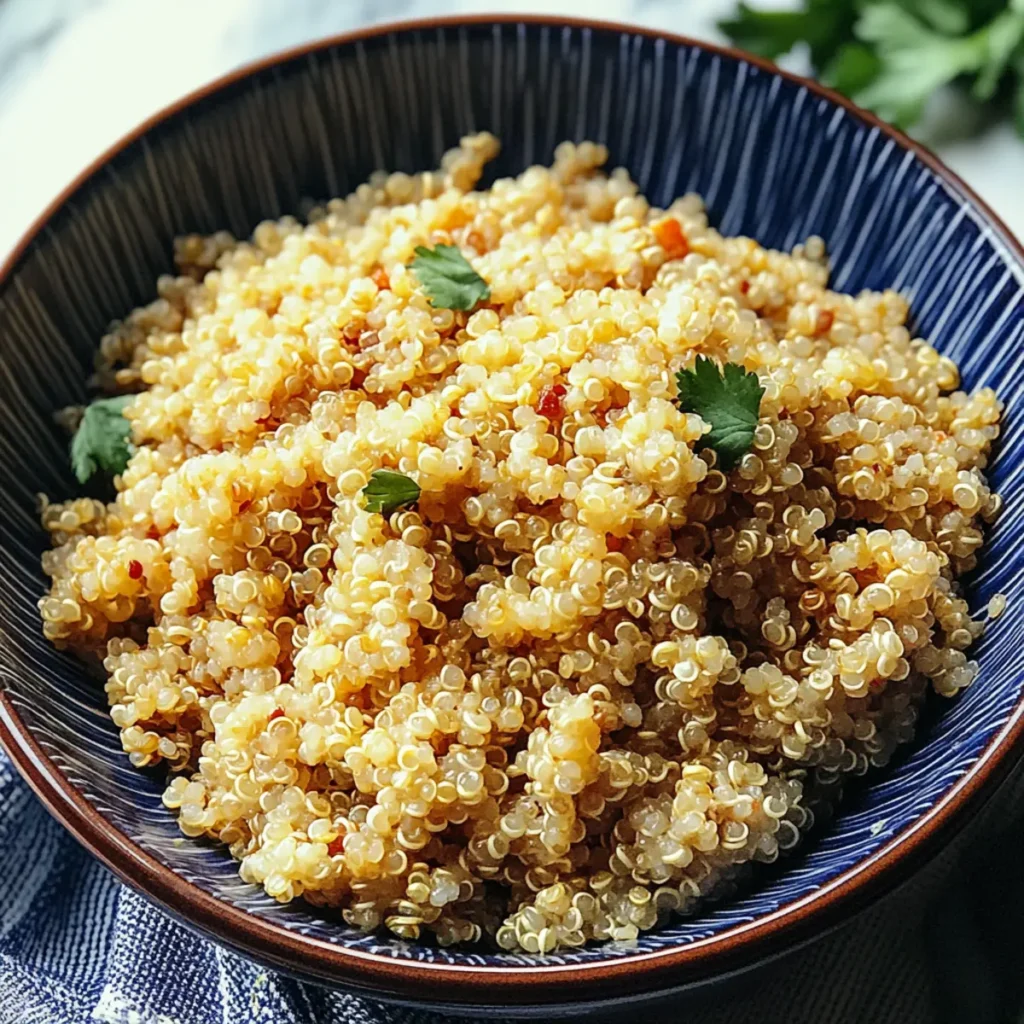
Quinoa in the Instant Pot is a lifesaver when you’re in a hurry yet craving something nutritious and delicious. Imagine fluffy grains bursting with flavor, all made in just minutes without the fuss of boiling pots and pan-sticking disasters. If you’ve ever wondered how to turn humble quinoa into a culinary masterpiece, you’re in luck. This Quinoa Instant Pot recipe is your ticket to transforming everyday meals into something truly special. Picture a cozy evening, a bowl of vibrant quinoa garnished with colorful veggies in front of you, unmistakably nutritious and oh-so-satisfying. It’s quick enough to whip up on a busy weeknight yet fancy enough for a laid-back dinner party. Who wouldn’t want that? Ingredients for Quinoa Instant Pot Here’s what you’ll need to make this delicious Quinoa Instant Pot: 1 cup quinoa – Rinse well under cold water to remove any bitter coating. Opt for organic quinoa if available for a healthier option. 2 cups water – This is the magic liquid that will hydrate those quinoa seeds beautifully. 1 tsp salt (optional) – Adds flavor, but can be omitted for a low-sodium version. How to Make Quinoa Instant Pot Follow these simple steps to prepare this delicious Quinoa Instant Pot: Step 1: Gather Your Ingredients Before you dive into cooking, make sure you have everything measured and ready to go. Rinse your quinoa under cold water, letting the grains dance around like they’re at a party. Step 2: Combine Ingredients in the Instant Pot Add the rinsed quinoa, water, and salt (if using) to the Instant Pot. Give it a gentle stir to ensure that the quinoa is evenly distributed and ready to absorb all that moisture. Step 3: Seal and Set Close the lid of your Instant Pot and turn the valve to sealing. Time to unleash the pressure! Set your Instant Pot to cook on high pressure for just 1 minute. Yes, you read that right. One minute! Step 4: Pressure Release Once the cooking time is up, allow the pressure to release naturally for about 10 minutes. After that, you can quick-release any remaining pressure. This is the most nerve-racking part, so make sure you keep your fingers clear of the steam! Step 5: Fluff and Serve Once all the pressure is released, open the lid and grab a fork to fluff the quinoa. It should be light and fluffy! Serve it alongside your favorite grilled chicken, in a veggie bowl, or even as a base for a stunning salad. Step 6: Enjoy! Drizzle on some olive oil, toss in some herbs, or squeeze a bit of lemon for an extra zing. Dive into that bowl of warmth and flavor. You deserve it! Perfecting Quinoa Instant Pot Cooking Process Start by rinsing your quinoa to remove any bitterness. Next, add the quinoa, water, and salt to the Instant Pot. Secure the lid, set the valve to sealing, and cook on high pressure for just one minute. Let it naturally release for 10 minutes to ensure fluffy quinoa. Add Your Touch to Quinoa Instant Pot Feel free to customize this quinoa dish! Swap out water for vegetable or chicken broth for an extra flavor kick. Toss in some fresh herbs or sautéed veggies to amp up the nutrition and taste. You can even sprinkle some cheese on top for a creamy finish. Storing & Reheating Quinoa Instant Pot Store leftover quinoa in an airtight container in the fridge for up to 4 days. For reheating, add a splash of water to prevent drying out, and microwave until warm. You can also fluff it in a pan over low heat with a drizzle of olive oil. You know, the first time I made this Quinoa Instant Pot recipe, my friends were convinced I had taken a culinary class somewhere fancy. Their reactions were priceless, and it felt like I was the hero of dinner. FAQs About Quinoa Instant Pot What is Quinoa Instant Pot? Quinoa Instant Pot refers to the method of cooking quinoa using an Instant Pot, a popular electric pressure cooker. This cooking technique simplifies the preparation of quinoa, allowing it to cook quickly and retain its fluffy texture. In just a matter of minutes, you can achieve perfectly cooked quinoa every time, making it a go-to choice for meal prep, side dishes, or healthy salads. The Instant Pot also helps infuse flavors, especially if you opt to use broth instead of water. How long does it take to cook quinoa in an Instant Pot? Cooking quinoa in an Instant Pot is a speedy process. Once you add rinsed quinoa, water, and optional salt to the pot, set it for just one minute on high pressure. After the cooking cycle is complete, allow the pressure to release naturally for ten minutes for optimal fluffiness. This total time, including preparation and natural release, adds up to approximately 20 minutes, making it a quick and efficient choice for busy weeknights. Can I add flavors to my quinoa when using the Instant Pot? Absolutely! One of the great perks of using the Instant Pot for quinoa is the flexibility to boost its flavor. Instead of cooking with plain water, consider using vegetable or chicken broth for depth. You can also throw in herbs, spices, and even finely chopped vegetables before cooking. After it’s done, feel free to add your favorite toppings, such as nuts, seeds, or cheese, to customize your dish and make it even more delicious. What can I serve with Quinoa Instant Pot? The beauty of Quinoa Instant Pot lies in its versatility. You can serve this nutty, fluffy grain as a base for various dishes. Pair it with grilled vegetables for a light meal, toss it in salads for added protein, or use it as a side dish alongside your favorite protein like chicken or fish. It also works great in wraps and bowls, and you can incorporate it into breakfast by adding fruits and nuts. The options are limitless! Conclusion for Quinoa Instant
Delicious Homemade Vegan Doritos Recipe in Under 30 Minutes
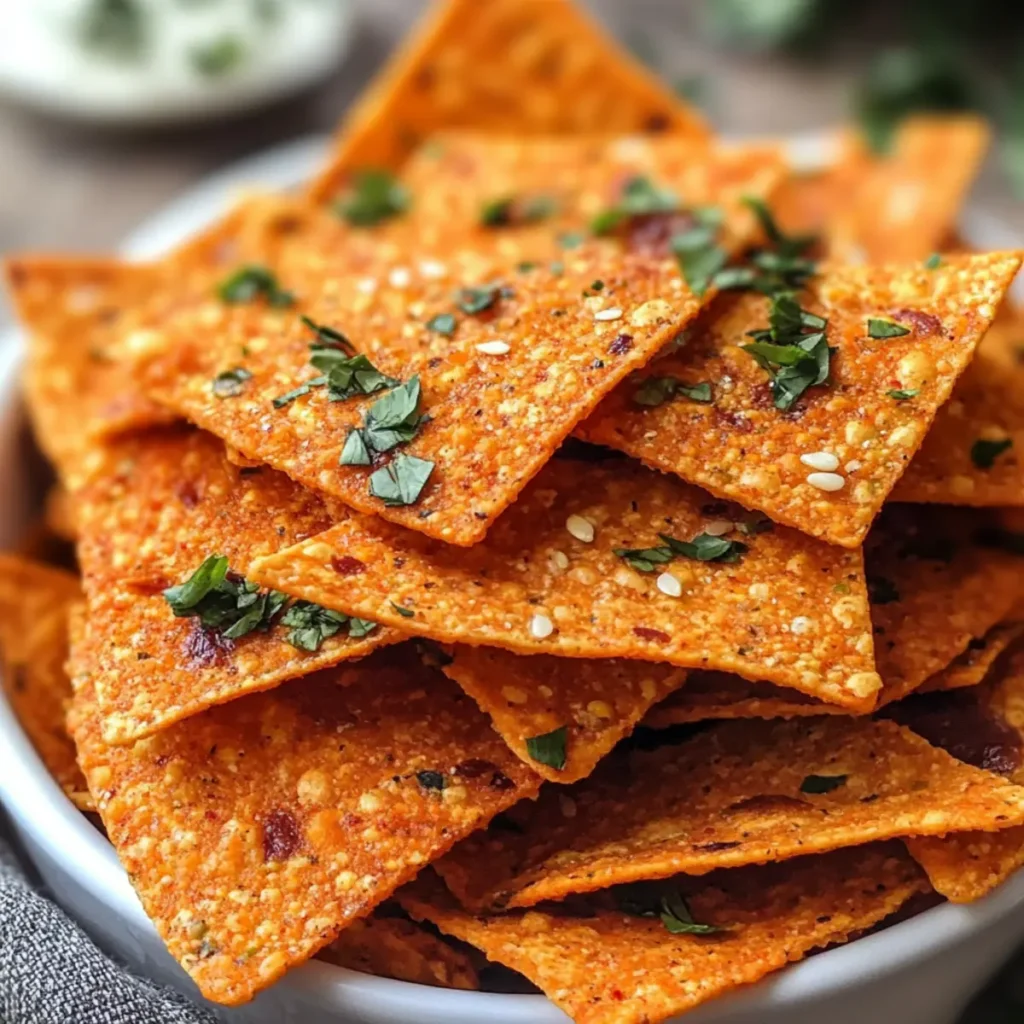
Imagine sinking your teeth into a crunchy, zesty chip that dances with the rich flavors of garlic, smoky paprika, and just a hint of heat. These homemade vegan Doritos are not just snacks; they’re an experience that will make your taste buds sing and your tummy rejoice. Trust me on this one—once you make these, you might just want to keep a stash in your pantry for when cravings hit. I remember the first time I set out to recreate that nostalgic taste of store-bought Doritos. It was a rainy afternoon, and I found myself craving something crispy and cheesy but didn’t want to delve into the monochrome land of boring potato chips. I was determined to whip up a homemade version that would not only satisfy my snacking desires but also impress my friends during game night. Spoiler alert: they didn’t believe they were vegan! Ingredients for Homemade Vegan Doritos Here’s what you’ll need to make this delicious Homemade Vegan Doritos: 4 corn tortillas – Look for the freshest ones you can find; they should be pliable but not too soft. 2 tablespoons olive oil – This will help the seasonings stick and give your chips that delightful crunch. 1/4 cup nutritional yeast – This is your secret weapon for that cheesy flavor without any dairy involved. 1 teaspoon smoked paprika – Adds a lovely smokiness and depth—think barbecue without the grill! 1 teaspoon garlic powder – A must for delivering that punchy flavor profile. 1 teaspoon onion powder – Elevates the overall taste, making every crunch a savory delight. 1/2 teaspoon cayenne pepper – If you like a kick, this will do the trick without overwhelming your taste buds. 1 teaspoon salt – Enhances flavor and balances the spices. 1 teaspoon chili powder – Gives your chips that authentic Dorito-style taste. 1 teaspoon cumin – Provides a warm, earthy character that ties it all together. How to Make Homemade Vegan Doritos Follow these simple steps to prepare this delicious Homemade Vegan Doritos: Step 1: Preheat and Prepare Preheat your oven to 350°F (175°C). While the oven is warming up, take a baking sheet and line it with parchment paper or simply spray it with a nonstick cooking spray. This will ensure your chips don’t stick and get that perfect crispy finish. Step 2: Brush the Tortillas Take your corn tortillas and brush each one generously with olive oil on both sides. Make sure every bite will have that tasty crunchiness. After all, we want chips, not sad, soggy tortillas! Step 3: Season Like a Pro In a small bowl, mix the nutritional yeast, smoked paprika, garlic powder, onion powder, cayenne pepper, salt, chili powder, and cumin. Once combined, sprinkle this glorious blend evenly over the oiled tortillas—don’t be shy; let the flavor rain down! Step 4: Cut and Arrange Stack the tortillas on top of one another and cut them into triangles. Arrange the pieces in a single layer on the baking sheet, ensuring there’s space in between for airflow. We want crispy chips, not a soggy mass! Step 5: Bake for Goodness Slide your baking sheet into the oven and allow the chips to bake for 10-12 minutes. Keep an eye on them; we want golden brown perfection! As they bake, your kitchen will be filled with mouthwatering aromas that make it nearly impossible to wait. Step 6: Cool It Down Once they reach that desirable golden hue and crispy texture, remove them from the oven and let them cool on the baking sheet for a few minutes. This step is crucial as it helps them firm up. Serve these homemade vegan Doritos with your favorite dips or munch on them straight from the baking sheet, but beware—they disappear quickly! There you have it—your very own homemade vegan Doritos, ready to conquer your snack cravings and impress your guests. Whether it’s movie night, a barbecue, or just a casual afternoon snack, these crispy delights are sure to be a hit. So, what are you waiting for? Grab those tortillas and get cooking! Perfecting Homemade Vegan Doritos Cooking Process Preheat your oven and efficiently brush each tortilla with olive oil before seasoning. Stack, cut, and arrange them for a uniform bake so that the tortilla chips achieve that all-important crunch. Add Your Touch to Homemade Vegan Doritos Feel free to swap out seasoning according to your cravings! Try adding herbs like oregano or thyme, or even a pinch of cinnamon for a sweet twist. You can also experiment with different oils for unique flavors. Storing & Reheating Homemade Vegan Doritos Store any leftovers in an airtight container at room temperature for up to three days. To reheat, pop them in the oven at 350°F for a few minutes to regain that crispy texture. It reminds me of the first time I made these for a game night with friends; their eyes lit up when they tried them, and requests for the recipe began flying around the room! FAQs About Homemade Vegan Doritos What is Homemade Vegan Doritos? Homemade Vegan Doritos are a delightful twist on the beloved snack, crafted without any animal products. Made from corn tortillas, seasoned with a blend of spices and nutritional yeast, they offer a crunchy, cheesy flavor that satisfies your cravings without the guilt. These chips are perfect for those following a vegan lifestyle or anyone looking to enjoy a healthier version of a classic snack. Best of all, they’re easy to make at home and can be customized to your taste preferences. How can I customize my Homemade Vegan Doritos? Customization is part of the fun when making Homemade Vegan Doritos! You can experiment with different spices to suit your palate. For a more savory kick, try adding a dash of onion powder or even some hot sauce to the oil before brushing it on the tortillas. If you’re feeling adventurous, sprinkle in crushed herbs like oregano or thyme for a fresh twist. This way, your homemade chips can be as
High-Protein Bagel Bites Recipe for Quick and Delicious Snacks

The aroma of freshly baked bagels wafts through the air, making taste buds tingle in anticipation. Now imagine those bagels transformed into bite-sized delights, packed with protein goodness. That’s right, we’re diving into the world of High-Protein Bagel Bites, an irresistible treat that tastes fantastic and provides a healthy boost. Whether you’re hosting game day, enjoying a cozy movie night, or just want a quick snack to munch on while binge-watching your favorite series, these High-Protein Bagel Bites are your new go-to. With their cheesy, savory explosion, they promise to be the life of the party—or, let’s face it, just your late-night snack buddy when the fridge calls your name. Ingredients for High-Protein Bagel Bites Here’s what you’ll need to make this delicious High-Protein Bagel Bites: 2 cups whole wheat flour – Choose whole wheat for added nutrition and a nutty flavor; it’s the backbone of our bite-sized masterpieces. 1 cup Greek yogurt – This creamy delight binds the dough and adds a hefty protein punch, making these bites super satisfying. 1 tbsp baking powder – The leavening agent that ensures your bagel bites rise, giving them that lovely, fluffy texture. 1 tsp salt – Just enough to enhance the flavors and make your tastebuds dance with joy. 1 cup shredded cheese – Use your favorite cheese (cheddar, mozzarella, or a blend) for an ooey-gooey filling that melts in your mouth. 2 tbsp sesame seeds – A perfect topping for a crunchy texture and nutty flavor, bringing that classic bagel vibe. 1 tbsp everything bagel seasoning – This magical blend takes your bites to the next level, delivering a beloved flavor that makes everyone go “wow.” How to Make High-Protein Bagel Bites Follow these simple steps to prepare this delicious High-Protein Bagel Bites: Step 1: Preheat Your Oven Get your oven ready by preheating it to 375°F (190°C). This is the temperature that will transform your dough into golden perfection. Step 2: Mix Dry Ingredients In a large bowl, combine the whole wheat flour, baking powder, and salt. Take a moment to enjoy the earthy scent of the flour as you whisk everything together, imagining how amazing these bites will taste. Step 3: Incorporate the Greek Yogurt Add the Greek yogurt to the dry ingredients. Start mixing until a dough forms, channeling your inner baker. It might seem a bit sticky at first, but it’ll come together beautifully! Step 4: Fold in the Goodness Gently fold in the shredded cheese, sesame seeds, and everything bagel seasoning. The cheese will melt magnificently as they bake, while the sesame seeds and seasoning will bring that signature touch. Step 5: Shape Your Bites Divide the dough into small ball shapes and place them on a baking sheet, allowing a little space between each ball. They’re going to puff up like little pillows in the oven, so give them some room! Step 6: Bake to Perfection Pop the baking sheet into the oven and bake for 15 minutes or until golden brown. The smell of these bagel bites will have your friends (and pets) gathering around the kitchen, eagerly anticipating the moment they’re ready to devour. Once they’re beautifully golden, transfer them to a plate—unless you have a sneaky intention to eat them all straight off the baking sheet! Now, let’s talk about how to enjoy these little bites of happiness. They’re great on their own, but they can also be paired with dipping sauces, cream cheese, or your favorite spreads. Picture yourself taking that first bite—chewy, cheesy, and just the right amount of savory aroma filling your senses. Trust me, these High-Protein Bagel Bites are guaranteed to put a smile on your face! When it comes to meal prep, these bites also hold up wonderfully, so feel free to whip up a batch in advance. Besides being a fantastic snack, they can also elevate any brunch spread or be a quick breakfast option. Those High-Protein Bagel Bites are versatile, delicious, and surprisingly simple—like your new best friend in the kitchen. So the next time you crave a snack that will satisfy your taste buds and give you a bit of a protein boost, reach for this recipe, and watch them vanish before your eyes. Enjoy every bite! This showstopping High-Protein Bagel Bites delivers restaurant-quality results using simple ingredients you probably already have at home. The perfect balance of textures and flavors creates an unforgettable dining experience that will have everyone asking for seconds. Picture-perfect presentation with vibrant colors makes this dish absolutely Instagram-worthy and guaranteed to impress any dinner guest. Incredibly versatile recipe that works beautifully for weeknight dinners, meal prep, special occasions, or even outdoor entertaining sessions. Perfecting High-Protein Bagel Bites Cooking Process To achieve the best results with your High-Protein Bagel Bites, begin by preheating the oven, then combine the dry ingredients before adding the yogurt. Lastly, fold in your cheese and seasonings seamlessly for a scrumptious dough. Add Your Touch to High-Protein Bagel Bites Feel free to customize your High-Protein Bagel Bites with different cheeses, herbs, or even spices. Try adding diced jalapeños for a spicy kick or swap in mozzarella for a stretchier, gooier bite. Storing & Reheating High-Protein Bagel Bites To store your High-Protein Bagel Bites, keep them in an airtight container in the fridge for up to 4 days. When reheating, pop them in the oven at 350°F (175°C) for a few minutes to maintain their chewiness. Nothing brings a family together quite like these High-Protein Bagel Bites. I remember preparing them for a game night, and the room erupted with laughter and compliments after each person tried one! They vanished almost instantly, and I had to whip up another batch. FAQs About High-Protein Bagel Bites What are High-Protein Bagel Bites? High-Protein Bagel Bites are a delicious and nutritious snack that combines the classic flavors of bagels with a protein boost. Made primarily from whole wheat flour and Greek yogurt, these bites are easy to prepare and perfect for any occasion. With shredded cheese, sesame seeds,
Delicious St. Patrick’s Day Snack Board Recipe for Festive Fun
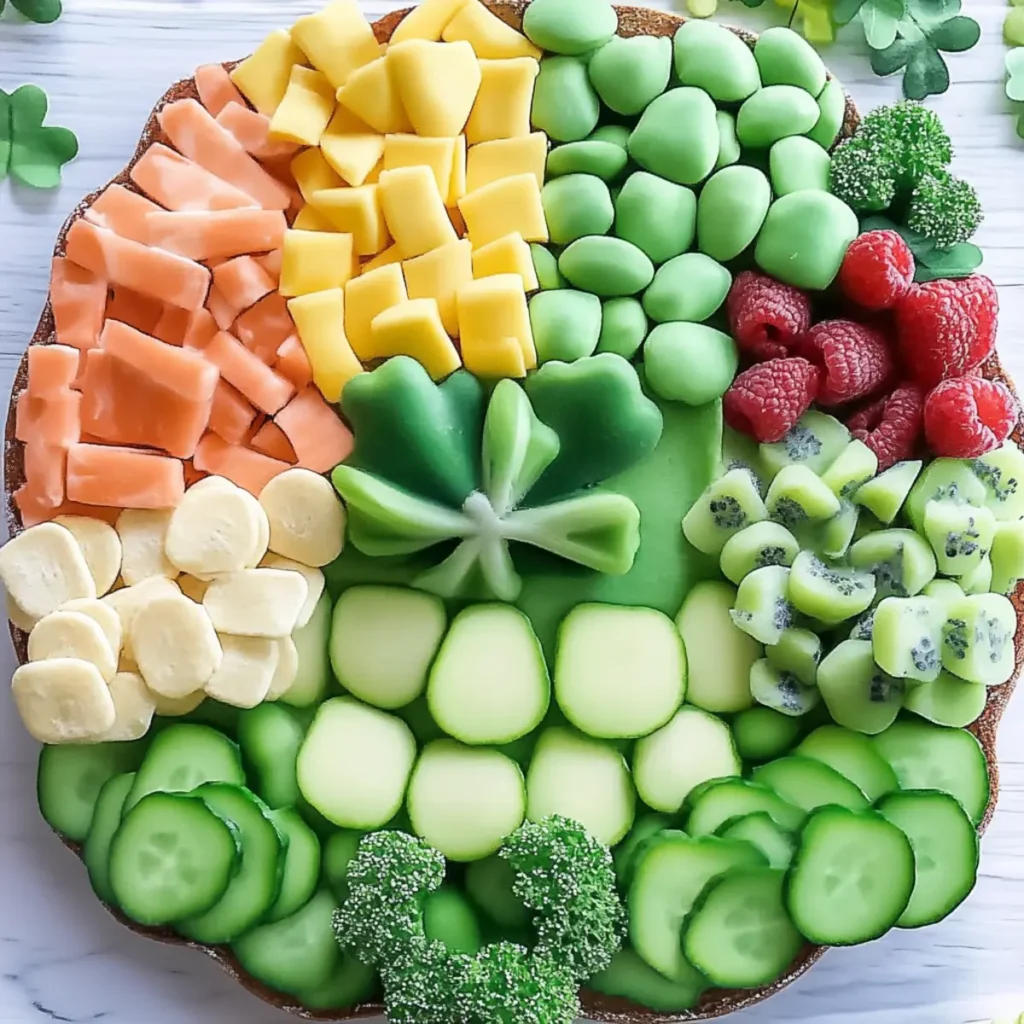
Get ready to celebrate St. Patrick’s Day in style with a vibrant St. Patrick’s Day Snack Board that promises to dazzle your taste buds and delight your guests! Picture this: fresh raspberries, green grapes, and a rainbow of colorful veggies all artfully arranged, beckoning you to dive in. This snack board is the perfect centerpiece for your festivities, combining fresh flavors with a playful spirit that’s bound to get everyone excited. Creating a St. Patrick’s Day Snack Board is not just about the food; it’s about bringing people together. I’ll never forget the first time I whipped up a colorful snack board for a gathering. It was a chaotic race against time, but the laughter and conversation that ensued over that dish transformed an ordinary day into something magical. So, let’s gather our ingredients and create a delicious snack explosion that everyone will be talking about long after the holiday has passed! Ingredients for St. Patrick’s Day Snack Board Here’s what you’ll need to make this delicious St. Patrick’s Day Snack Board: 1 cup raspberries – These bright red gems add a sweet-tart flavor that pairs beautifully with the crunch of veggies. Look for plump, firm berries. 1 cup orange bell peppers – For a splash of sweetness and site delight, choose firm bell peppers without blemishes that are full of flavor. 1 cup yellow bell pepper – Just like the orange ones, these provide sweetness and color. Opt for those with shiny skin for the best taste. 1 cup sugar snap peas – Crisp and sweet, these peas add a delightful crunch. Choose vibrant green ones that snap easily when bent. 1 cup blueberries – Bursting with juicy flavor, they round out the texture of the snack board. Look for blueberries that are plump and have a silvery bloom. 1 cup purple grapes – Sweet and satisfying, grapes can be served whole or sliced. Choose firm grapes that have a rich color. 1 half avocado – Creamy and delicious, an avocado is perfect for adding richness. Choose one that’s slightly soft but not mushy for optimal flavor. 1 cup mini vegan marshmallows – For a fun and sweet touch, these mini delights bring nostalgia and a pop of fluffiness to your board. 1 medium English cucumber – Light and refreshing, cucumbers offer a crisp bite. Look for smooth, firm cucumbers with a vibrant green hue. 1 cup green grapes – Another sweet delight, they provide variety in your snack board. Ensure they are plump and firm for the best taste experience. 1 medium kiwi – Sweet with a hint of tang, kiwis stand out for their unique flavor and fuzzy exterior. Choose ones that yield slightly to pressure. 2 slices sandwich bread – For a bit of substance, these slices can be cut into fun shapes or sticks for dipping and pairing. 1 cup green hummus – A flavorful dip loaded with nutrients that ties everything together beautifully. You can make your own or find a store-bought option that’s vibrant green and delicious. 1 cup green vegan dark chocolate candy gems – For a bit of sweetness and color contrast, these candy gems make an adorable addition and sweeten up the snack experience! 1 cup guacamole (optional) – The creamy goodness enhances the flavors and adds a touch of indulgence to your board. How to Make St. Patrick’s Day Snack Board Follow these simple steps to prepare this delicious St. Patrick’s Day Snack Board: Step 1: Gather Your Ingredients First things first, gather all your beautiful ingredients. Find a large platter or a cutting board to really make everything pop. Lay it all out so you can see how colorful and inviting your snack board will be. Step 2: Prep the Fresh Fruits and Veggies Rinse your fruits and veggies under cold water, ensuring they’re spotless and fresh. Slice the cucumbers into rounds, halve the avocado, and chop the bell peppers into bite-sized pieces. Slice the kiwi into rounds to reveal its green interior! Step 3: Arrange Your Snack Board Begin by placing the large items like the avocado and hummus in a couple of spots on the platter. Then, fill in with the colorful fruits and veggies, artfully arranging each piece. Treat it like a work of art! Step 4: Add the Sweet Treats Sprinkle the mini vegan marshmallows and candy gems in little clusters around the board. This pop of sweetness not only looks inviting but also balances the savory elements beautifully. Step 5: Serve with Bread and Dips Cut the sandwich bread into fun shapes or sticks and place them alongside the guacamole and green hummus. These will be perfect for dipping and creating a wonderful mouthfeel with each bite. Step 6: Get Ready to Enjoy! Once everything is beautifully arranged, let the appetizer sit for a few moments so everyone can admire your genius before diving in! Serve immediately and enjoy the festivities. For an added touch, consider pairing it with a light, festive drink. Whether you’re sipping on a sparkling soda or a green shamrock shake, your St. Patrick’s Day Snack Board is destined to be the star of the party! This showstopping St. Patrick’s Day Snack Board delivers restaurant-quality results using simple ingredients you probably already have at home. The perfect balance of textures and flavors creates an unforgettable dining experience that will have everyone asking for seconds. Picture-perfect presentation with vibrant colors makes this dish absolutely Instagram-worthy and guaranteed to impress any dinner guest. Incredibly versatile recipe that works beautifully for weeknight dinners, meal prep, special occasions, or even outdoor entertaining sessions. Perfecting St. Patrick’s Day Snack Board Cooking Process Start by washing all your fruits and veggies to give them a fresh start. Slice the cucumber, grapes, and kiwi while arranging the colorful ingredients on a platter. Lastly, have your dips ready for a beautiful presentation. Add Your Touch to St. Patrick’s Day Snack Board Feel free to swap out ingredients based on your preferences. For a twist, use red
Savory Nutritional Yeast Power Dressing: Quick and Flavorful Recipe
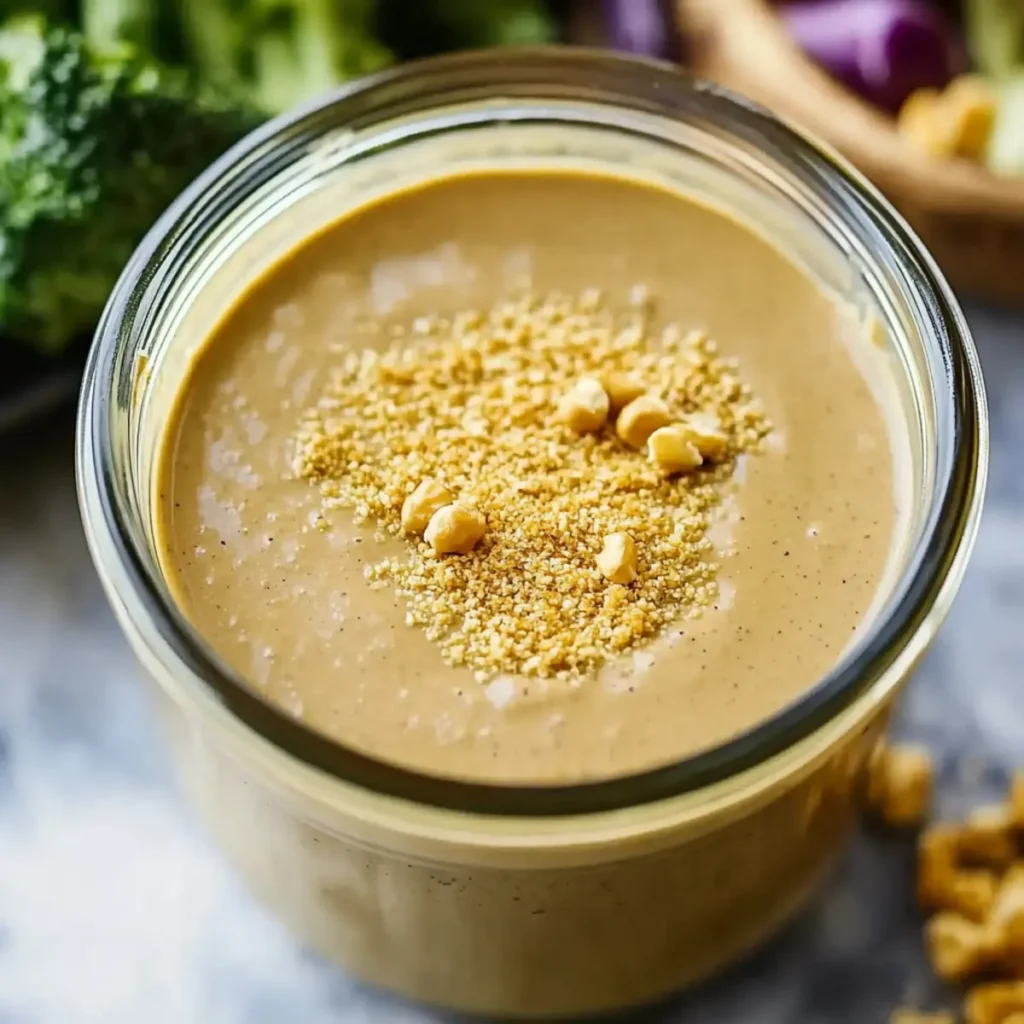
Delicious, creamy, and packed with umami goodness, this Savory Nutritional Yeast Power Dressing takes the ordinary salad to new heights! Ideal for drenching your greens or dipping fresh veggies, this dressing promises to elevate your mealtime experience and keep your taste buds dancing with joy. Imagine drizzling a rich, golden-hued dressing over a vibrant salad, exploding with the flavors of garlic, tangy apple cider vinegar, and savory nutritional yeast. It’s like your dish got a flavorful makeover, ensuring freshness in every bite, which is precisely what makes this dressing so special. Ingredients for Savory Nutritional Yeast Power Dressing Here’s what you’ll need to make this delicious Savory Nutritional Yeast Power Dressing: 1 cup nutritional yeast – This superstar ingredient adds a cheesy, nutty flavor while providing a healthy dose of B vitamins. ⅓ cup apple cider vinegar – The perfect zing for our dressing, apple cider vinegar brings acidity that balances the richness beautifully. 1 tablespoon apple cider vinegar – A little extra acidity to ensure your dressing packs a punch of flavor. ¼ cup coconut aminos or low-sodium tamari or soy sauce – These bring saltiness and a hint of sweetness, enhancing the overall umami flavor. 3 cloves garlic – Minced finely, garlic infuses the dressing with a bold, aromatic bite that complements the other flavors. 1 pinch sea salt – A little pinch goes a long way, providing crucial flavor enhancement without overpowering the dish. Ground pepper – Add to taste; it adds an extra layer of warmth and complexity. ⅓ cup extra-virgin olive oil – Rich, fruity olive oil provides smoothness and helps marry all the other flavors together. How to Make Savory Nutritional Yeast Power Dressing Follow these simple steps to prepare this delicious Savory Nutritional Yeast Power Dressing: Step 1: Combine Ingredients In a blender, combine the nutritional yeast, both measurements of apple cider vinegar, coconut aminos, minced garlic, sea salt, and ground pepper. This is the flavorful base of your dressing, so give it a good whirl! Step 2: Blend Until Smooth Blend the ingredients together on a high setting until you achieve a creamy and smooth consistency. If you don’t have a blender, fear not! A sturdy whisk and some elbow grease will work, just ensure the garlic is finely minced to blend well. Step 3: Add Olive Oil Gradually With the blender running on a low setting, slowly add in the extra-virgin olive oil. This will create a beautiful emulsion, resulting in velvety texture that enhances the dressing’s richness. Step 4: Taste and Adjust Stop the blender and give your dressing a taste. Is it missing something? Add more salt, pepper, or acidity by squeezing in a bit more apple cider vinegar to suit your preferences. Step 5: Store or Serve Transfer the dressing to an airtight container and refrigerate it for at least 30 minutes to allow the flavors to meld. When ready to serve, give it a little stir, then drizzle generously over your favorite salad or use it as a dip! Step 6: Enjoy! Whether you’re diving into a fresh garden salad or using it to liven up roasted veggies, enjoy the incredible flavors and health benefits this Savory Nutritional Yeast Power Dressing delivers! In just about five minutes, you’ve unlocked a secret dressing that can be tailored for any occasion, whether you’re preparing a casual dinner or an extravagant feast. So, pull out some leafy greens, and get ready to shower them with this savory goodness. Bon appétit! Perfecting Savory Nutritional Yeast Power Dressing Cooking Process For the best results, start by gathering and prepping all your ingredients. Blend the dressing components first, then slowly drizzle in the olive oil for a creamy finish. This sequence ensures a smooth and rich dressing that everyone will love. Add Your Touch to Savory Nutritional Yeast Power Dressing Feel free to mix things up! Swap coconut aminos for soy sauce for a bolder taste or add herbs like basil or oregano to give it a fresh twist. Experiment with different vinegars too; balsamic can offer a delightful sweetness! Storing & Reheating Savory Nutritional Yeast Power Dressing Store any leftover dressing in an airtight container in the fridge for up to a week. If it thickens, simply whisk in a bit of water or olive oil to restore its creamy consistency before serving. Sometimes, I whip up this dressing for friends during game night. The compliments keep rolling in, and I can’t help but smile knowing I’ve transformed simple ingredients into something memorable. It’s always a hit! FAQs About Savory Nutritional Yeast Power Dressing What is Savory Nutritional Yeast Power Dressing? Savory Nutritional Yeast Power Dressing is a delicious and versatile dressing made primarily from nutritional yeast, which adds a cheesy flavor without the dairy. This dressing combines apple cider vinegar, coconut aminos or tamari, minced garlic, and olive oil for a rich and creamy texture. Perfect for salads, roasted vegetables, and grain bowls, it provides a nutritional boost while enhancing the meal’s flavor profile. How can I use Savory Nutritional Yeast Power Dressing? Savory Nutritional Yeast Power Dressing is incredibly versatile. You can drizzle it over salads for a zesty flavor kick, use it as a dip for fresh veggies, or toss it with roasted vegetables to elevate their taste. It’s also great on grain bowls, adding an extra layer of flavor to quinoa or brown rice dishes. The options are endless! Can I customize my Savory Nutritional Yeast Power Dressing? Absolutely! Customizing your Savory Nutritional Yeast Power Dressing is a fun way to create the perfect flavor profile for your taste buds. Try adding herbs like fresh basil or oregano for a herby touch, or substitute the apple cider vinegar with balsamic vinegar for a sweeter note. Adjusting the garlic and salt can also change the taste to what you love most. How long can I store Savory Nutritional Yeast Power Dressing? You can store your Savory Nutritional Yeast Power Dressing in an airtight container in the fridge for
Delicious Traditional Caesar Dressing Recipe for Perfect Salads
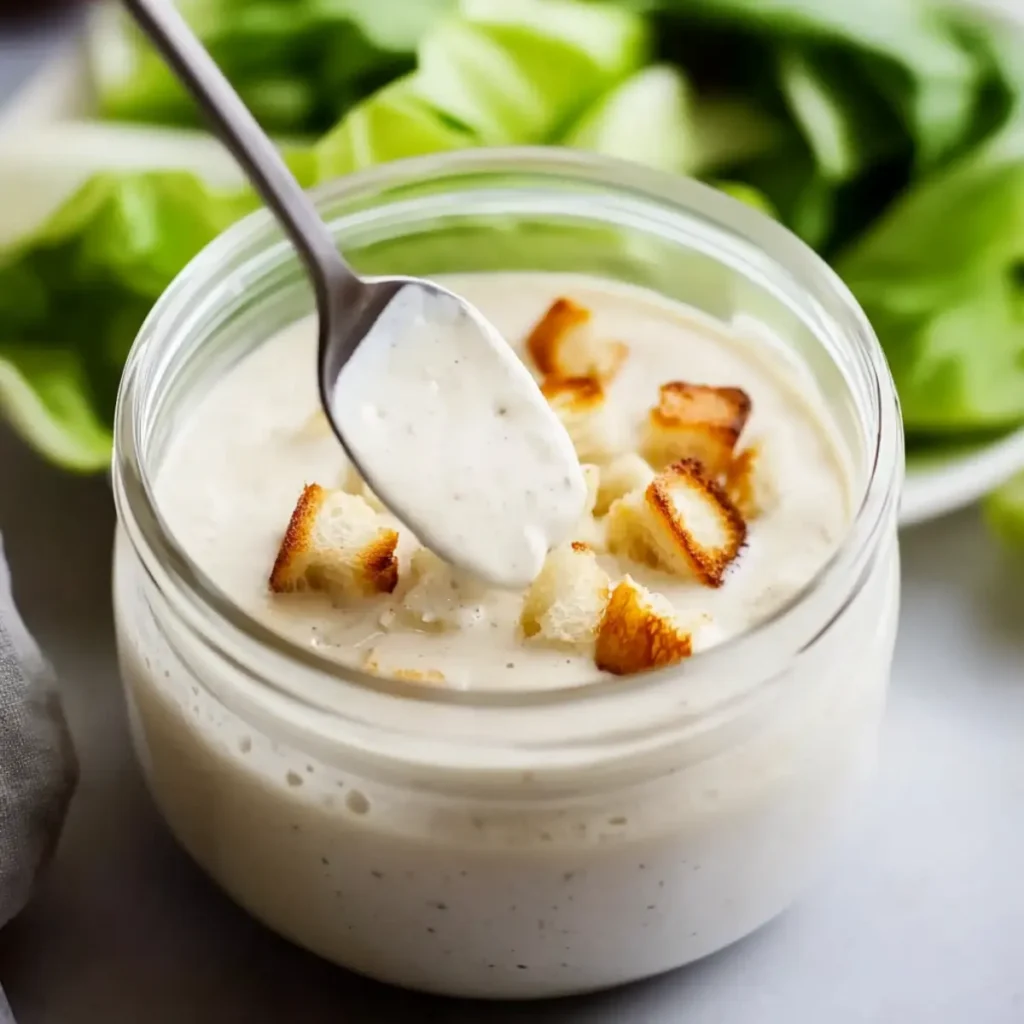
Captivating your taste buds like an elegant dance on your palate, a delicious Traditional Caesar dressing brings life to salads like never before. The creamy, zesty blend of ingredients offers an explosion of flavor that’s both comforting and invigorating, elevating even the most humble greens into gourmet delights. Imagine this: you’ve just slapped together a simple salad of crisp romaine and crunchy croutons, but with a drizzle of this magic potion, it transforms into something worthy of Michelin-starred praise. Whether it’s a casual family dinner or a chic soiree, the anticipation of that first bite is sure to put a smile on your face while nodding in blissful agreement about the wonders of homemade dressing. Ingredients for Delicious Traditional Caesar Dressing Recipe for Perfect Salads Here’s what you’ll need to make this delicious Delicious Traditional Caesar Dressing Recipe for Perfect Salads: 1 clove garlic – Slice it thin to release those aromatic oils and make your dressing sing with flavor. 1 rib celery – Cut up to add crunch and a subtle earthy note. 1/2 medium onion – A little bite goes a long way; pick a sweet or yellow onion for balance. 1 teaspoon pepper – Freshly ground is best; it gives your dressing a nice kick! 1 heaping teaspoon salt – Essential for bringing all the flavors to life. 1 can anchovies (2 oz in oil) – Tiny fish with big flavor; these little guys are the secret weapon of dressings. 1/2 teaspoon sugar – Just a hint to balance the acidity and enhance the overall flavor. 2 tablespoons mustard – Adds tanginess and a lovely depth of flavor; Dijon is especially nice here. 1 tablespoon fresh lemon juice – Brightens everything up with its zesty freshness. 3 eggs – These will help emulsify the dressing, making it rich and creamy. 2 cups vegetable oil – This is the magic ingredient that transforms everything into velvety gold. How to Make Delicious Traditional Caesar Dressing Recipe for Perfect Salads Follow these simple steps to prepare this delicious Delicious Traditional Caesar Dressing Recipe for Perfect Salads: Step 1: Prepare the Ingredients Gather all your ingredients and a large mixing bowl. The anticipation is building as you’ll soon be whisking up a dressing that will have everyone begging for more. Step 2: Combine the Base Ingredients In the mixing bowl, toss in the garlic, celery, onion, pepper, salt, anchovies, sugar, mustard, lemon juice, and eggs. This is where the fun begins! Using a whisk or a blender, combine them well, allowing those robust flavors to meld together beautifully. Step 3: Whisk in the Oil Now for the smooth transition! Slowly drizzle in the vegetable oil while continuing to whisk ferociously. This process helps emulsify the dressing, transforming it into that creamy consistency we all crave. Step 4: Taste and Adjust It’s essential to “taste as you go,” my friend! This is your opportunity to add more salt, pepper, or lemon juice if you’d like to enhance the flavors further. Remember, the perfect dressing is all about balance! Step 5: Chill and Serve Once you’ve reached the desired taste, cover the bowl and let your dressing chill in the fridge for about 30 minutes. This waiting period will not only help the flavors deepen but give you ample time to whip up your favorite salad. Step 6: Serve and Enjoy All done! Drizzle your perfect Traditional Caesar dressing over salads, use it as a dip for veggies, or even drizzle it on grilled chicken. Once you taste the glorious creation you’ve made, you might just feel like a culinary superstar! This showstopping Delicious Traditional Caesar Dressing Recipe for Perfect Salads delivers restaurant-quality results using simple ingredients you probably already have at home. The perfect balance of textures and flavors creates an unforgettable dining experience that will have everyone asking for seconds. Picture-perfect presentation with vibrant colors makes this dish absolutely Instagram-worthy and guaranteed to impress any dinner guest. Incredibly versatile recipe that works beautifully for weeknight dinners, meal prep, special occasions, or even outdoor entertaining sessions. Perfecting Delicious Traditional Caesar Dressing Recipe for Perfect Salads Cooking Process Start by combining the garlic, celery, and onion in a mixing bowl to create a flavorful base. Then, whisk in the anchovies, sugar, mustard, lemon juice, and eggs. Gradually add the vegetable oil for a creamy texture. Add Your Touch to Delicious Traditional Caesar Dressing Recipe for Perfect Salads Feel free to customize your dressing by substituting Greek yogurt for a lighter version or adding capers for an extra tang. A dash of hot sauce can spice things up nicely! Storing & Reheating Delicious Traditional Caesar Dressing Recipe for Perfect Salads Store your leftover dressing in an airtight container in the fridge for up to a week. If it thickens, simply whisk in a little water or lemon juice to restore its creamy consistency. Sharing this recipe brings back fond memories of my Aunt Clara’s dinner parties. She always served her Caesar salad drenched in homemade dressing, and it was a surefire way to get everyone to the table. FAQs About Delicious Traditional Caesar Dressing Recipe for Perfect Salads What is Delicious Traditional Caesar Dressing Recipe for Perfect Salads? The Delicious Traditional Caesar Dressing Recipe for Perfect Salads is a timeless dressing that elevates any salad experience. Made with simple, fresh ingredients such as garlicky anchovies, zesty lemon juice, and rich egg yolks, this dressing offers a creamy and tangy flavor profile that pairs beautifully with crisp romaine lettuce. You can whip it up in just a few minutes, and it’s perfect for drizzling over your favorite salads or as a dip for veggies. How long does it take to prepare Delicious Traditional Caesar Dressing Recipe for Perfect Salads? Preparing the Delicious Traditional Caesar Dressing Recipe for Perfect Salads takes about 10 minutes. Simply combine your ingredients in a mixing bowl, whisk them together, and gradually add vegetable oil until the mixture reaches a creamy consistency. With just a bit of whisking, you’ll have
Easy Spicy Sriracha Mayonnaise Recipe for Sushi Bowls Delights
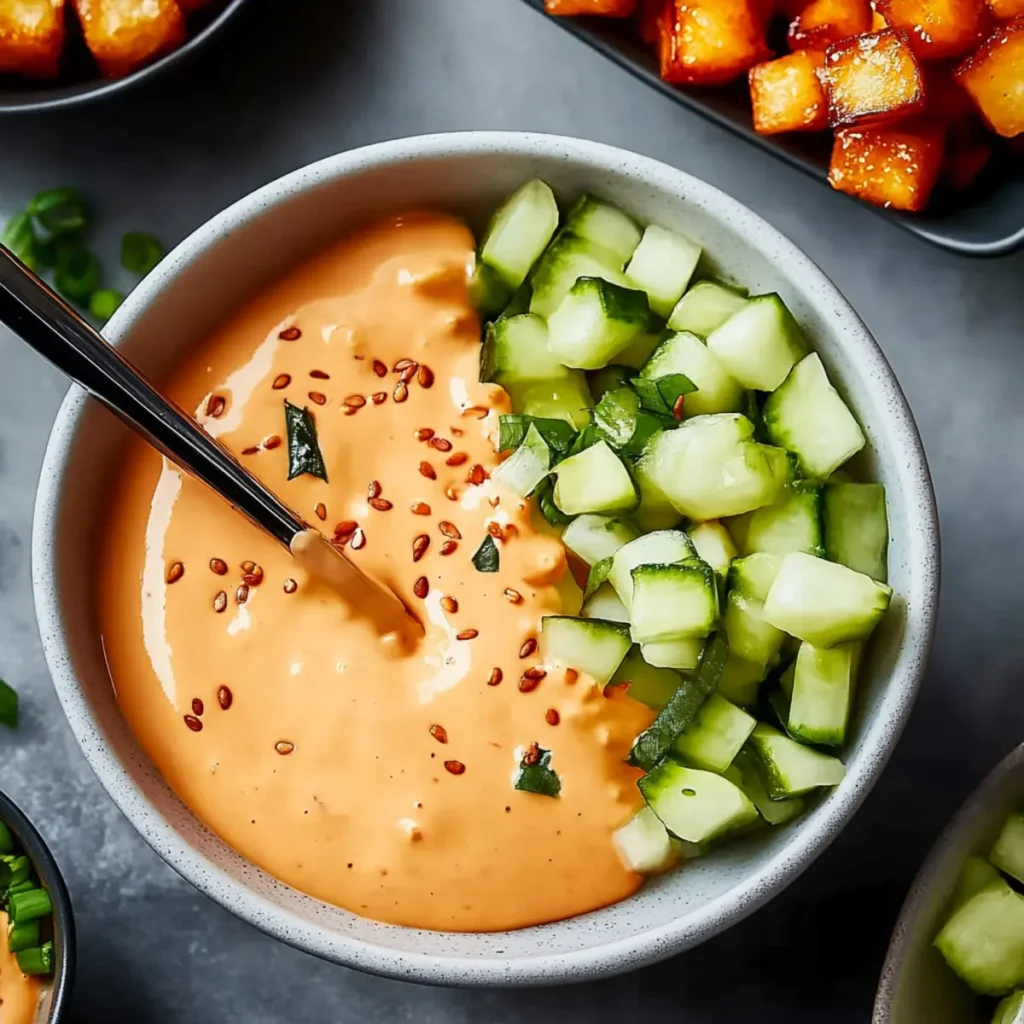
The dish you are about to make, the Easy Spicy Sriracha Mayonnaise Recipe for Perfect Sushi Bowls, is nothing short of a culinary showstopper. Imagine a luscious, creamy sauce that captures the essence of spicy, tangy flavors with a hint of umami — it’s like a party in your mouth with every dip. Not only will this sensational condiment elevate your sushi bowls to gourmet status, but it will also awaken your taste buds, transforming even the most basic ingredients into something extraordinary. I remember the first time I whipped up this magical concoction. It was one of those rainy afternoons when boredom crept in, and I thought, “Why not play with my condiments?” Fast forward to me happily slathering this sauce over everything from sushi to sandwiches. I became convinced that this Easy Spicy Sriracha Mayonnaise was destined to be a household staple. So grab your whisk, and let’s dive into how this creamy delight can spice up your meal times. Ingredients for Easy Spicy Sriracha Mayonnaise Recipe for Perfect Sushi Bowls Here’s what you’ll need to make this delicious Easy Spicy Sriracha Mayonnaise Recipe for Perfect Sushi Bowls: 0.5 cup mayonnaise – Choose a high-quality mayo for the best flavor. You can also use vegan mayonnaise if preferred. 2 tablespoons sriracha – Add more or less depending on your spice tolerance; it’s your taste adventure! 1 teaspoon fresh lime juice – Freshly squeezed lime juice adds brightness and a tangy kick. 0.125 teaspoon toasted sesame oil – This aromatic oil brings a nutty, depth of flavor that enhances the sauce beautifully. How to Make Easy Spicy Sriracha Mayonnaise Recipe for Perfect Sushi Bowls Follow these simple steps to prepare this delicious Easy Spicy Sriracha Mayonnaise Recipe for Perfect Sushi Bowls: Step 1: Gather Your Ingredients Before you begin your culinary masterpiece, gather all your ingredients close at hand. This not only helps streamline the process but ensures you can whip up your sauce without any interruptions. Don’t forget to have a small bowl and a whisk ready for mixing! Step 2: Combine the Base In your small bowl, add the 0.5 cup of mayonnaise. This forms the creamy base of your sauce. Mayonnaise will give you that silky texture that pairs wonderfully with the other ingredients. Step 3: Add the Heat Next, it’s time to unleash the fire! Stir in the 2 tablespoons of sriracha. Feel free to sample at this point; it’s important to find your preferred level of heat. Step 4: Balance the Flavors Pour in the 1 teaspoon of fresh lime juice. The acidity of the lime will cut through the richness of the mayonnaise while enhancing the flavors. Give the mixture a good stir until all the ingredients are well combined. Step 5: Finish with a Nutty Aroma Drizzle in the 0.125 teaspoon of toasted sesame oil. This will add a lovely roasted aroma to your sauce. Mix once more; you want everything to blend perfectly. Step 6: Taste and Adjust Now comes the most fun part—tasting! Dip a spoon into your creation and see if it meets your flavor expectations. This is your chance to adjust the heat or acidity to your liking, so feel free to add more sriracha or lime juice if you like. When everything is perfectly mixed and you’re already imagining the compliments on your sushi bowls, transfer your Easy Spicy Sriracha Mayonnaise into a serving dish. Drizzle it generously over your sushi creations — or whatever else your heart desires! You won’t just be eating; you’ll be diving into a flavor experience that’s sure to impress. And there you have it, a super simple yet utterly delicious Easy Spicy Sriracha Mayonnaise Recipe for Perfect Sushi Bowls. Now get ready to level up your meal prep game and watch your friends marvel at your newly acquired zest for flavor. Happy cooking! Perfecting Easy Spicy Sriracha Mayonnaise Recipe for Perfect Sushi Bowls Cooking Process To nail this Easy Spicy Sriracha Mayonnaise Recipe for Perfect Sushi Bowls, start by prepping all your ingredients first. Mix your mayonnaise, sriracha, lime juice, and sesame oil together for a seamless and flavorful sauce that ties everything together. Add Your Touch to Easy Spicy Sriracha Mayonnaise Recipe for Perfect Sushi Bowls Feel free to customize your Easy Spicy Sriracha Mayonnaise Recipe for Perfect Sushi Bowls. Swap out sriracha for your favorite hot sauce or add a splash of soy sauce for an umami twist. The world is your oyster! Storing & Reheating Easy Spicy Sriracha Mayonnaise Recipe for Perfect Sushi Bowls Store any leftover Easy Spicy Sriracha Mayonnaise in an airtight container in the fridge for up to one week. There’s no need to reheat; just give it a good stir before using it on your sushi bowls again. It’s funny how a simple sauce can create such a stir. The last time I made this Easy Spicy Sriracha Mayonnaise Recipe for Perfect Sushi Bowls, my friends declared it the highlight of the evening, asking for the recipe by the end of the night—all while the sushi spiraled towards oblivion and my kitchen turned into a hot mess! FAQs About Easy Spicy Sriracha Mayonnaise Recipe for Perfect Sushi Bowls What is Easy Spicy Sriracha Mayonnaise Recipe for Perfect Sushi Bowls? The Easy Spicy Sriracha Mayonnaise Recipe for Perfect Sushi Bowls is a creamy, flavorful sauce that elevates any sushi dish. It combines mayonnaise, sriracha, fresh lime juice, and toasted sesame oil for a delicious balance of creaminess, heat, and tang. This sauce not only enhances sushi bowls but can also be used as a dip or spread, making it a versatile addition to your cooking repertoire. It’s quick to prepare, taking only 5 minutes, and ensures a delightful zing that pairs perfectly with the fresh ingredients in sushi. How do I customize the Easy Spicy Sriracha Mayonnaise Recipe for Perfect Sushi Bowls? You can easily customize your Easy Spicy Sriracha Mayonnaise Recipe for Perfect Sushi Bowls to suit your taste preferences. Try swapping out
Healthy Homemade Mayonnaise Recipe with Greek Yogurt and Olive Oil
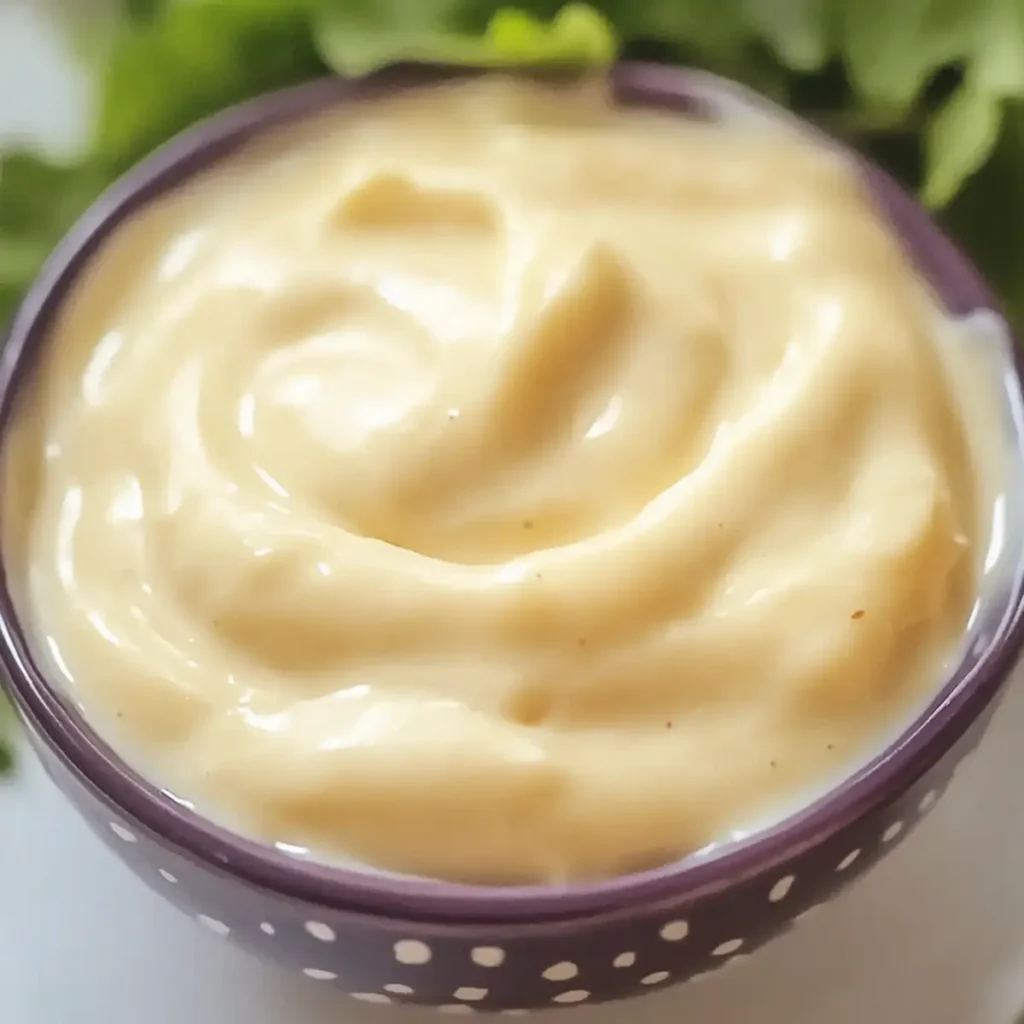
Here’s a delightful journey into the world of flavors with Healthy Homemade Mayonnaise. Imagine a creamy, silkiness that gently caresses your taste buds, blending perfectly with fresh sandwiches, crisp veggies, or even that exciting deviled egg recipe you can’t resist. This homemade version will not only elevate your dishes but also leave you boasting about your culinary prowess to family and friends. Picture this: a warm summer afternoon, you’ve whipped up a batch of this Healthy Homemade Mayonnaise that instantly transports you back to your grandmother’s kitchen, where the air is thick with laughter and the aroma of freshly made treats. Whether it’s a picnic in the park or a cozy family dinner, this mayo is the secret that takes your dishes from good to absolutely drool-worthy. You’ll be left wondering why you ever settled for store-bought! Ingredients for Healthy Homemade Mayonnaise Here’s what you’ll need to make this delicious Healthy Homemade Mayonnaise: 3 pieces boiled eggs – These are the superstar base that brings creaminess and richness to your mayo. Make sure they’re perfectly cooked for the best flavor. 0.25 cup water – Adjust the consistency of your mayo. A little more can make it creamier for those who love a thicker spread. 2 tbsp Greek yogurt – Adds a tangy kick while boosting the nutritional value. Opt for plain yogurt for the best flavor. 1.5 tbsp olive oil – A heart-healthy fat that contributes to the silky texture of your mayo. Use extra virgin for the best taste. 2 tsp apple cider vinegar or lemon juice – This gives your mayo a refreshing zest. Choose apple cider vinegar for a milder flavor or lemon juice for bright citrus notes. 0.33 to 0.5 tsp salt – Season to taste. Salt enhances all the flavors, so don’t be shy here! 1 to 2 tsp Dijon mustard (optional) – For those who like a little kick, mustard adds depth. Use as much or as little as you prefer. How to Make Healthy Homemade Mayonnaise Follow these simple steps to prepare this delicious Healthy Homemade Mayonnaise: Step 1: Gather Your Tools Start by rounding up your best kitchen buddies: a blender or food processor, a measuring cup, and, of course, a spatula to scrape every last bit of that creamy goodness from the sides. Step 2: Combine Ingredients In your blender, toss in the boiled eggs, water, Greek yogurt, olive oil, apple cider vinegar or lemon juice, salt, and mustard if you’re in the mood. It’s like a flavor party waiting to happen. Step 3: Blend Until Smooth Secure the lid on your blender and blend on high until the mixture is rich and creamy. You want it to look as silky as a cloud on a sunny day. This should only take about 30 seconds! Step 4: Taste and Adjust Now for the fun part—give it a taste! Feel free to add more salt or adjust the vinegar or mustard to match your flavor preferences. This mayo should be your personal masterpiece. Step 5: Chill and Store Pour your Healthy Homemade Mayonnaise into a mason jar or an airtight container. Refrigerate it for at least 30 minutes to allow the flavors to meld beautifully together. Step 6: Serve and Enjoy Use your homemade mayo as a delectable spread on sandwiches, a dip for fresh veggies, or even as a dressing for salads. Your culinary adventures are just getting started! With this Healthy Homemade Mayonnaise in your kitchen arsenal, you can transform your meals into something truly special. Plus, you’ll have the satisfaction of knowing exactly what went into it—no mysterious ingredients or preservatives here. Enjoy the creamy goodness! Perfecting Healthy Homemade Mayonnaise Cooking Process For the most efficient and perfect results, blend your boiled eggs and water first to achieve a smooth base. Then, gradually add yogurt, olive oil, vinegar, and seasonings while blending on high to create that rich, creamy texture. Add Your Touch to Healthy Homemade Mayonnaise Feel free to swap Greek yogurt with avocado for a creamier alternative or kick up the flavor with your favorite spices. A dash of garlic powder or fresh herbs like dill can also add a delightful twist. Storing & Reheating Healthy Homemade Mayonnaise Store your homemade mayo in an airtight container or mason jar in the fridge for up to five days. There’s no need to reheat it; simply stir to combine if it separates slightly. Making this mayo reminds me of a potluck where I brought it along. Everyone was raving about how “store-bought” it tasted, and I had to fess up—I wasn’t telling any mayonnaise secrets! The smiles on their faces were worth every second of blending. FAQs About Healthy Homemade Mayonnaise What is Healthy Homemade Mayonnaise? Healthy Homemade Mayonnaise is a creamy condiment made from simple ingredients such as boiled eggs, Greek yogurt, olive oil, and vinegar or lemon juice. Unlike traditional mayonnaise, which is often high in unhealthy fats, this version provides a lighter, nutritious alternative that doesn’t compromise on flavor. It’s quick to prepare and can easily elevate your sandwiches, salads, and dips with a fresh, homemade touch. How long does Healthy Homemade Mayonnaise last? Your Healthy Homemade Mayonnaise will stay fresh in the fridge for up to five days. To store it properly, transfer the mayo into a mason jar or any airtight container to ensure maximum freshness. If it separates slightly, just give it a good stir before using. This preservation tip will keep your mayo delectable for several days, so you can enjoy this homemade treasure in multiple meals. Can I customize my Healthy Homemade Mayonnaise? Absolutely! One of the joys of making your Healthy Homemade Mayonnaise is the ability to customize it to suit your palate. You can swap Greek yogurt with mashed avocado for a creamier texture or enhance its flavor profile with spices like garlic powder or fresh herbs such as dill or parsley. Experimenting with different combinations makes this recipe uniquely yours, perfect for all occasions! Is Healthy Homemade
Delicious Stuffed Bagel Bites Recipe in Under 40 Minutes

The tantalizing aroma of freshly baked bread wafts through the air, beckoning you to the kitchen for a delightful culinary adventure. Picture this: warm, soft bagels, lovingly stuffed with creamy cheese, savory smoked salmon, and a sprinkle of fresh chives. These Stuffed Bagel Bites are not just a treat; they’re an experience that you’ll want to share with friends, family, or maybe just savor all to yourself. Imagine tearing into these golden-brown bites, the crisp exterior giving way to a creamy and flavorful surprise inside. They are perfect for brunch, a casual snack, or a fancy affair—because who wouldn’t want to impress their guests with a homemade delicacy? Just wait until you taste that harmonious blend of flavors. You’ll be hooked! Ingredients for Stuffed Bagel Bites Here’s what you’ll need to make this delicious Stuffed Bagel Bites: 1 cup self-rising flour – This is your base for the dough, providing rise without the need for additional leavening agents. 1/2 cup nonfat plain strained yogurt – Helps create a moist and tender texture while keeping the calories low. 3 teaspoons all-purpose flour – A little additional flour for dusting and helping to manage the dough’s stickiness. 2.5 ounces cream cheese – The creamy heart of the bite, adding richness and indulgence. 1 tablespoon fresh chives – Offers a fresh, onion-like flavor that enhances the overall profile of these bites. 1 teaspoon lemon zest – Provides a bright, citrusy kick that balances the richness of the cream cheese. 2 tablespoons everything bagel seasoning – The magic sprinkle that makes these taste like your favorite bagel shop’s special. 2 tablespoons water – To help bind the dough and adjust consistency as needed. 2 ounces smoked salmon – Adds a touch of luxury and provides a savory depth of flavor. 1 large egg – Used to brush the tops for a golden finish that makes you want to dive right in. How to Make Stuffed Bagel Bites Follow these simple steps to prepare this delicious Stuffed Bagel Bites: Step 1: Prepare the Dough In a mixing bowl, combine the self-rising flour and yogurt. Mix until a dough forms. It might seem a little sticky at first, but don’t worry; this is part of the charm of homemade dough! Step 2: Shape the Dough Divide the dough into equal portions and gently roll each one into a ball. Flatten each ball slightly, as these will be the little pockets that hold all the deliciousness. Trust me; your fingers will thank you later! Step 3: Fill the Dough Place a small dollop of cream cheese in the center of the flattened ball, followed by a piece of smoked salmon and a pinch of chives. Imagine being a little Santa Claus of savory treats, delivering flavor gifts tucked inside dough. Step 4: Seal the Bites Fold the edges of the dough over the filling to encase it completely. Pinch the edges together firmly to create a little treasure chest of flavor. You don’t want any of that goodness escaping! Step 5: Ready for the Egg Wash Brush the tops of the stuffed bites with a beaten egg. This step is crucial for that golden color and beautiful finish. Sprinkle everything bagel seasoning on top—this is where the magic happens. Step 6: Air Fry the Bagel Bites Preheat your air fryer to a medium temperature and cook the bagel bites for about 6 minutes until they are golden brown. The aromas wafting from your kitchen will make it hard to wait! Once they’re beautiful and golden, carefully transfer to a plate to cool slightly and enjoy with some extra smoked salmon, cream cheese, or simply on their own. Each bite is a delightful explosion of flavors, and I dare you to eat just one! Stuffed Bagel Bites are more than just snacks—they’re a mini celebration for yourself or a fun treat for gatherings. So roll up your sleeves, let your creativity shine, and embark on your stuffed bagel adventure today! This showstopping Stuffed Bagel Bites delivers restaurant-quality results using simple ingredients you probably already have at home. The perfect balance of textures and flavors creates an unforgettable dining experience that will have everyone asking for seconds. Picture-perfect presentation with vibrant colors makes this dish absolutely Instagram-worthy and guaranteed to impress any dinner guest. Incredibly versatile recipe that works beautifully for weeknight dinners, meal prep, special occasions, or even outdoor entertaining sessions. Perfecting Stuffed Bagel Bites Cooking Process To achieve efficiency and perfect results, begin by mixing the self-rising flour and yogurt until a dough forms. While the dough rests, prep your fillings like cream cheese, salmon, and chives. Once your fillings are ready, shape and fill the dough to streamline the cooking process. Add Your Touch to Stuffed Bagel Bites Feel free to customize your Stuffed Bagel Bites! Swap the smoked salmon for cooked bacon or sautéed veggies for a vegetarian version. Experiment with different cream cheese flavors or seasonings to make them your own, ensuring every bite is unique and delightful. Storing & Reheating Stuffed Bagel Bites To store leftover Stuffed Bagel Bites, place them in an airtight container in the fridge for up to three days. To reheat, pop them in the air fryer for a few minutes to regain that lovely crispiness without losing flavor. Sharing this recipe with friends at a cozy gathering made my heart sing. Everyone loved how these Stuffed Bagel Bites were simple yet packed with flavor, sparking laughter and joy around the table. FAQs About Stuffed Bagel Bites What is Stuffed Bagel Bites? Stuffed Bagel Bites are delightful bite-sized treats made from a simple dough of self-rising flour and yogurt, filled with creamy goodness and savory ingredients. They often include cream cheese, smoked salmon, and fresh herbs, but their true beauty lies in their versatility. You can customize them with various fillings to suit your taste. Perfect for snacks, appetizers, or a fun breakfast, these bagel bites are crispy on the outside and creamy on the inside—an unforgettable culinary
Delicious Vegan Caesar Dressing Recipe Ready in Just 5 Minutes
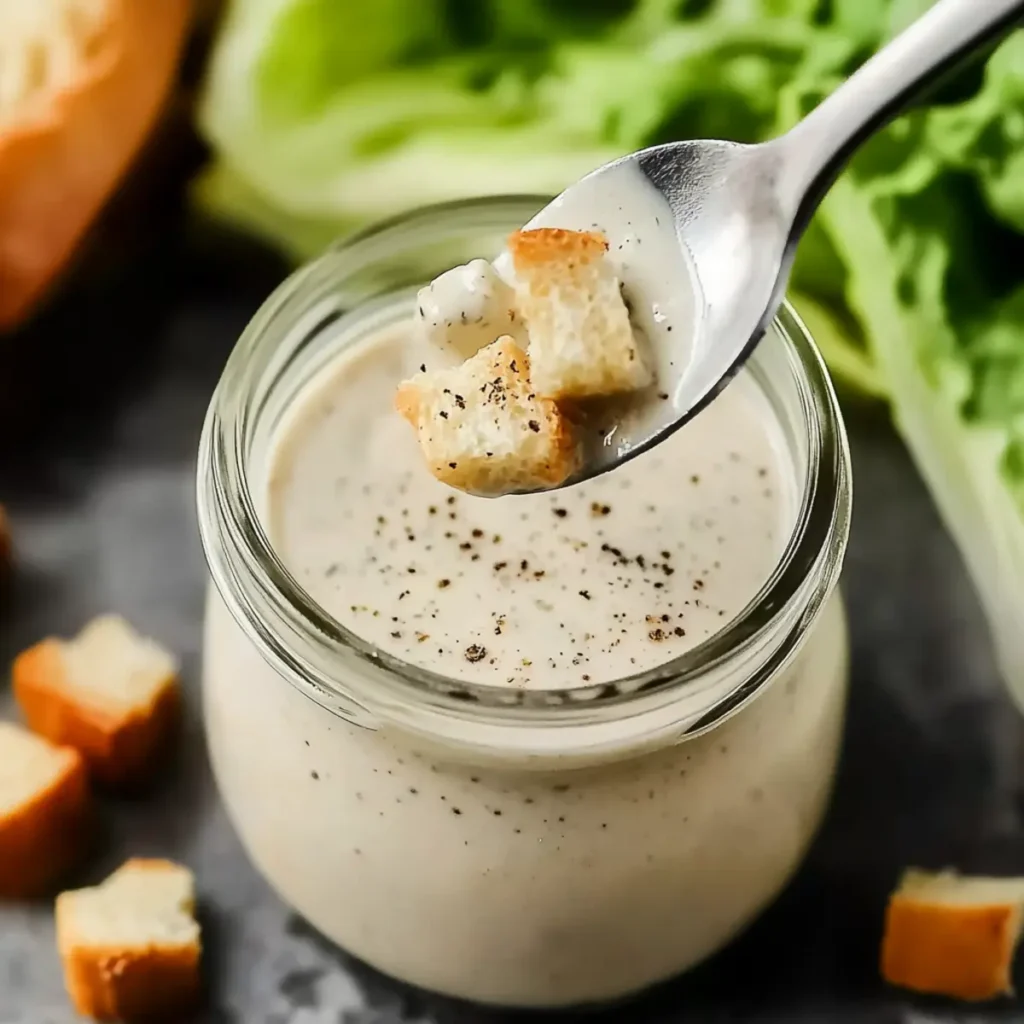
Delicious Vegan Caesar Dressing is the creamy, tangy solution to all your salad woes. Imagine a dressing that’s rich yet guilt-free, transforming your greens into a flavor-packed explosion. It’s perfect for those sunny picnics, cozy dinners, or just a Tuesday when you want your veggies to dance on your taste buds. But let’s face it, salads can sometimes feel like they’re dressed in boring old water. This easy-to-make dressing is here to save your leafy greens from a life of mediocrity. With its garlicky kick, zesty lemon notes, and umami from capers, this dressing takes your salads to the next level, making even the plainest of greens practically irresistible. Ingredients for Delicious Vegan Caesar Dressing Here’s what you’ll need to make this delicious Delicious Vegan Caesar Dressing: 1 cup raw cashews – Soaked in hot water to soften them, these nuts create a creamy base for your dressing. 3/4 cup water – Divided between soaking the cashews and blending; this helps achieve the desired consistency. 2 cloves garlic – Fresh cloves will add that necessary zing while keeping the flavors bright and bold. 3 tablespoons lemon juice – A splash of citrus ensures that your dressing is bright and refreshing, enhancing all the other flavors. 1 tablespoon dijon mustard – Adds depth and a subtle spiciness that makes traditional Caesar dressing so beloved. 1 tablespoon capers – These salty little gems contribute a briny kick, reminiscent of the classic Caesar experience. 1 tablespoon vegan Worcestershire sauce – For that umami punch, this vegan version maintains the characteristic flavor without any animal products. 1/2 teaspoon salt – Adjust to taste, but this helps to enhance all the delicious flavors in the dressing. How to Make Delicious Vegan Caesar Dressing Follow these simple steps to prepare this delicious Delicious Vegan Caesar Dressing: Step 1: Soak the Cashews Start by soaking the raw cashews in hot water for about 5 minutes. This will soften them, allowing for a smoother blend later on. Step 2: Drain and Rinse After soaking, drain the cashews and give them a quick rinse under running water to remove any excess residue. Step 3: Blend the Ingredients Add the soaked cashews to your blender along with the garlic, lemon juice, Dijon mustard, capers, vegan Worcestershire sauce, salt, and 3/4 cup of fresh water. Blend until everything is super smooth and creamy. Step 4: Adjust Consistency If the dressing is thicker than desired, feel free to add a bit more water, 1 tablespoon at a time, until you reach your preferred consistency. Remember, no one likes a salad drowning in dressing! Step 5: Taste and Season Give your dressing a taste and adjust the seasoning if needed. This is your chance to go wild; maybe a little more lemon for brightness or an extra pinch of salt for flavor. Step 6: Serve It Up Now it’s showtime! Toss this delicious Vegan Caesar Dressing with chopped romaine, kale, or any leafy greens you fancy. For added texture, sprinkle in some crunchy croutons and, if you’re feeling fancy, a dusting of vegan Parmesan. Now you have a vibrantly delicious, delightful dressing that enhances your salads and leaves everyone wanting more. Drizzle it over your greens, or use it as a dip for veggies; the options are endless, and the only limit is your imagination! Enjoy your salad journey with this incredibly easy, creamy masterpiece. Perfecting Delicious Vegan Caesar Dressing Cooking Process Start by soaking the raw cashews in hot water to soften them. While they soak, gather the remaining ingredients. Once the cashews are ready, simply blend everything together until silky smooth for an effortless, delicious dressing. Add Your Touch to Delicious Vegan Caesar Dressing Feel free to customize this dressing by adding nutritional yeast for a cheesy flavor, a pinch of paprika for smokiness, or swap out garlic for roasted garlic to enhance the richness. The options are endless! Storing & Reheating Delicious Vegan Caesar Dressing Store any leftover dressing in an airtight container in the fridge for up to a week. If it thickens, simply stir in a little water to get it back to the desired consistency, no heat required. Creating this dressing always reminds me of a dinner party where everyone thought I had been slaving away in the kitchen. When I told them it took just five minutes, their jaws dropped! FAQs About Delicious Vegan Caesar Dressing What is Delicious Vegan Caesar Dressing? Delicious Vegan Caesar Dressing is a plant-based alternative to traditional Caesar dressing that typically contains anchovies and dairy. This homemade version is creamy, flavorful, and easy to prepare using raw cashews, garlic, lemon juice, and a few other simple ingredients. It captures the essence of the original dressing without sacrificing flavor, making it a perfect fit for salads, wraps, or as a dipping sauce. Whether you are vegan, lactose intolerant, or just looking for a healthier alternative, this dressing will elevate your salads and impress your guests. How long can I store Delicious Vegan Caesar Dressing? You can store your Delicious Vegan Caesar Dressing in an airtight container in the fridge for up to one week. Be mindful that the dressing may thicken slightly after being refrigerated. If this happens, just add a little water and stir well to restore its creamy consistency. Always give it a shake or a stir before serving to ensure the flavors are well mixed. This makes it super convenient for meal prep, allowing you to enjoy this tasty dressing all week long. Can I customize my Delicious Vegan Caesar Dressing? Absolutely! One of the best aspects of making your own Delicious Vegan Caesar Dressing is that you can customize it to fit your taste. Want a cheesy flavor? Add nutritional yeast! Looking for a bit of zing? Toss in some capers or a splash of hot sauce. You can even experiment with different herbs or spices to make it uniquely yours. Don’t hesitate to get creative and play around with the ingredients until you find the perfect