
Delicious Loaded Chicken Fries with Creamy Cheese Sauce Recipe
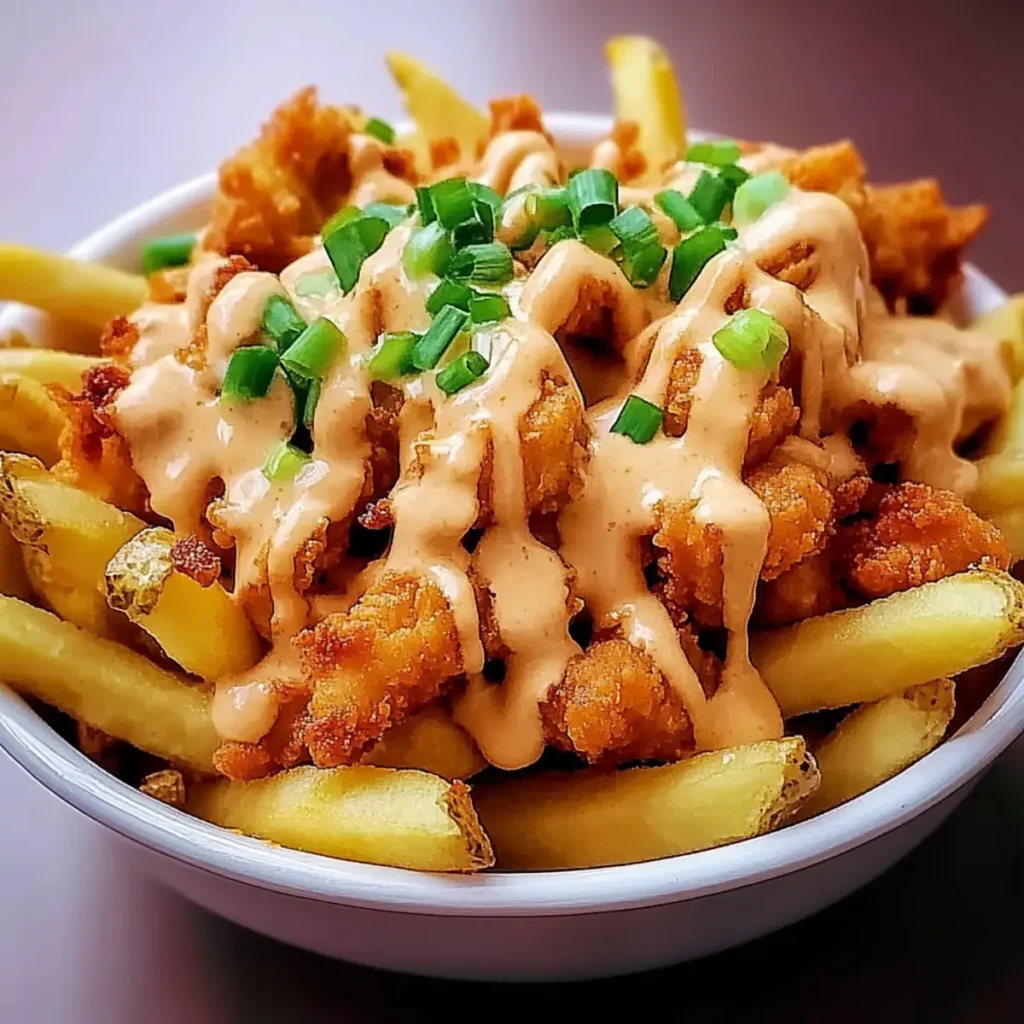
There’s something undeniably magical about the combination of crispy fries and tender, seasoned chicken topped with a creamy cheese sauce. This is not your average side dish; this is a plate of pure happiness! With the Delicious Loaded Chicken Fries with Creamy Cheese Sauce Recipe, your taste buds are in for a flavor fiesta that’ll have you swooning. Imagine golden-brown fries hiding underneath piles of shredded marinated chicken slathered in a luxurious cheese sauce. What could be better? The best part? You don’t need to be a master chef to whip this up in your kitchen. Perfect for a cozy night in or as a show-stopping appetizer at your next gathering, this recipe is an explosion of flavors, textures, and warmth. So, pull up a chair and let’s dive into the delicious world of loaded chicken fries. Ingredients for Delicious Loaded Chicken Fries with Creamy Cheese Sauce Recipe Here’s what you’ll need to make this delicious Delicious Loaded Chicken Fries with Creamy Cheese Sauce Recipe: 0.55 lb boneless chicken – Choose skinless chicken for a tender and juicy base that’s easy to shred. 1 cup buttermilk – The secret ingredient for marinating; it tenderizes the chicken and adds a tangy flavor. 1 teaspoon salt – Essential for enhancing all the flavors of the dish. 1 teaspoon red chili powder – For a kick of heat that balances the richness of the cheese. 0.5 teaspoon garlic powder – Adds a savory aroma and depth of flavor. 1 teaspoon dry coriander powder – A fragrant herb that provides a unique twist to the dish. 1 teaspoon red chili flakes – Optional, but highly recommended for those who love a bit of spice. 0.5 teaspoon black pepper powder – A little heat to complement the flavors. 0.25 teaspoon turmeric powder – Adds color and a subtle earthy flavor. 0.5 teaspoon cumin powder – For a warm and nutty essence. to taste lemon juice – Freshens the dish and enhances the chicken’s flavors. cooked french fries – Use your favorite frozen or homemade fries as the tasty base. sliced bell pepper (optional) – Adds a pop of color and sweetness. 2 tablespoons butter – Used to create a rich and creamy cheese sauce. 2 tablespoons all-purpose flour – Thickens the sauce to perfection. 1 cup milk – Ensures that the cheese sauce is creamy and smooth. 0.25 teaspoon salt – For seasoning the cheese sauce. 0.5 teaspoon red chili powder – To match the chicken’s flavor profile. grated cheddar cheese – The star of the cheese sauce, giving it rich, bold flavor. grated mozzarella cheese – Adds creaminess and a wonderful meltiness. 2 tablespoons cream – This elevates your cheese sauce to a new level of indulgence. How to Make Delicious Loaded Chicken Fries with Creamy Cheese Sauce Recipe Follow these simple steps to prepare this delicious Delicious Loaded Chicken Fries with Creamy Cheese Sauce Recipe: Step 1: Marinate the Chicken In a large bowl, combine the boneless chicken, buttermilk, salt, red chili powder, garlic powder, dry coriander powder, red chili flakes, black pepper powder, turmeric powder, cumin powder, and a splash of lemon juice. Mix well and let the chicken marinate for at least 30 minutes while the magic happens. Step 2: Cook and Shred the Chicken Cook the marinated chicken in a skillet over medium heat for about 10-15 minutes or until fully cooked. Once it’s golden and juicy, shred it with two forks or your fingers. Set it aside and embrace the aromas wafting through your kitchen. Step 3: Prepare the Cheese Sauce In a saucepan over medium heat, melt the butter until it’s bubbling. Whisk in the flour to create a roux, then slowly add the milk, stirring constantly until the mixture thickens. You’re aiming for that velvety texture — it’s worth the whisking workout. Step 4: Add the Cheeses Stir in the grated cheddar and mozzarella cheeses along with the salt and red chili powder. Keep stirring until the cheeses are melted and the sauce is smooth and luxurious. You might want to dip everything in it right then and there. Step 5: Assemble Your Loaded Fries On a large serving platter or individual plates, layer your cooked fries with a generous portion of the shredded chicken. Then, drizzle that delightful cheese sauce over the top like a warm, silky blanket. If you’re feeling fancy, scatter some sliced bell pepper for an extra crunch. Step 6: Serve with Love Presentation matters, so take a moment to admire your creation. Transfer your loaded chicken fries onto plates with a sprinkle of fresh herbs or more chili flakes. Enjoy immediately for the best flavor and texture! Now that you’ve learned how to make the Delicious Loaded Chicken Fries with Creamy Cheese Sauce Recipe, you’re equipped for the ultimate comfort food experience. This dish is perfect for sharing, or keeping all to yourself—no judgment here! Enjoy every cheesy, gooey bite, and don’t forget to snap a picture for social media. Your friends will be drooling in no time. Perfecting Delicious Loaded Chicken Fries with Creamy Cheese Sauce Recipe Cooking Process Start by marinating your chicken in buttermilk and spices to ensure maximum flavor. While that’s soaking, prep your fries for crispy perfection. Then, cook the chicken, shred it, and whip up your creamy cheese sauce, bringing it all together for a delightful finish. Add Your Touch to Delicious Loaded Chicken Fries with Creamy Cheese Sauce Recipe Feel free to swap out chicken for turkey or even a meat alternative for a tasty twist. Experiment with different cheese blends, like pepper jack or gouda, and toss in jalapeños or green onions for an extra kick. Storing & Reheating Delicious Loaded Chicken Fries with Creamy Cheese Sauce Recipe Store any leftovers in an airtight container in the fridge for up to three days. To reheat, pop it in the microwave or oven until heated through, adding a splash of milk to the cheese sauce if it thickens too much. While I was whipping
Crispy Honey-Garlic Cauliflower Recipe for a Flavorful Snack
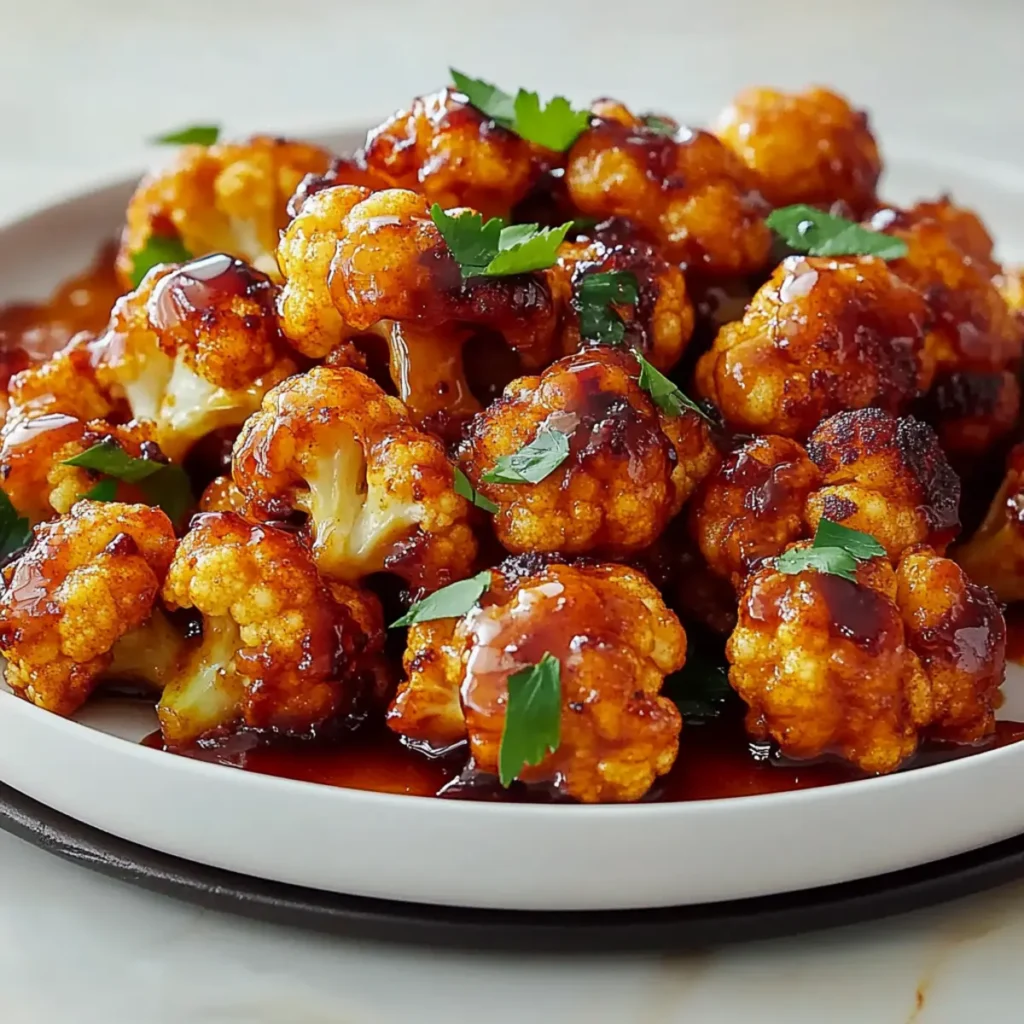
The aroma of roasted cauliflower mingling with sweetness and a hint of spice fills your kitchen as you prepare to indulge in a delightful dish. Honey-Garlic Cauliflower is not just a meal; it’s a flavor explosion that transports you to a cozy eatery where every bite is a joyous celebration of flavors and textures. Imagine biting into perfectly crispy cauliflower, coated in a luscious honey-garlic sauce that dances on your taste buds. This dish is ideal for a cozy family night or a fun gathering with friends; it serves as the perfect accompaniment to any meal or a stand-alone snack that will leave everyone asking for seconds. Ingredients for Honey-Garlic Cauliflower Here’s what you’ll need to make this delicious Honey-Garlic Cauliflower: 1 cup all-purpose flour – This flour forms the base for the crispy coating that provides a delightful crunch. 2 cups panko breadcrumbs – These Japanese breadcrumbs are lighter and crispier than regular breadcrumbs, giving an exquisite texture. 3 large eggs, beaten – The eggs act as a binding agent to help the breadcrumbs adhere to the cauliflower. 1 head cauliflower, chopped into bite-size florets – Select a firm cauliflower with tightly packed florets for the best results. 2/3 cup honey – This natural sweetener adds depth and richness to the sauce. 2/3 cup soy sauce – A savory staple that enhances the flavor profile of the dish. 4 cloves garlic, minced – Fresh garlic brings a robust, aromatic kick that complements the sweetness of the honey. Juice of 2 limes – The acidity brightens the dish, balancing the sweetness and richness. 2 Tbsp. sriracha – For those who enjoy a spicy touch, sriracha adds just the right amount of heat. 1/2 cup water – Used to adjust the sauce’s consistency. 4 tsp. corn starch – When mixed with water, it thickens the sauce, giving it a perfect coating consistency. 1/4 cup sliced scallions – These not only add a pop of color but also a fresh, mild onion flavor. How to Make Honey-Garlic Cauliflower Follow these simple steps to prepare this delicious Honey-Garlic Cauliflower: Step 1: Preheat the Oven Preheat your oven to 400°F (200°C). While it’s warming up, prepare a baking sheet with parchment paper or a nonstick cooking spray to make cleanup a breeze. Step 2: Set Up Your Breading Station In three separate shallow bowls, set up a breading station. Place the all-purpose flour in the first bowl, the beaten eggs in the second, and the panko breadcrumbs in the third. This makes it easier to dip each cauliflower floret as you prepare to bread them. Step 3: Bread the Cauliflower Take each cauliflower floret and dip it into the flour first, ensuring it’s generously coated. Then, dunk it into the beaten eggs, allowing any excess to drip off, before finally coating it with panko breadcrumbs. Make sure it’s well covered for that irresistible crunch! Step 4: Bake Until Golden Arrange the breaded cauliflower florets on the prepared baking sheet. Bake in the preheated oven for about 25 minutes, or until they turn golden brown and crispy. Flip them halfway through to ensure even cooking. Step 5: Whisk Up the Sauce While the cauliflower bakes, grab a saucepan. Combine honey, soy sauce, minced garlic, lime juice, sriracha, and the water over medium heat. Stir it until it begins to simmer and the flavors meld beautifully. Step 6: Thicken the Sauce In a small bowl, mix the corn starch with a couple of teaspoons of water to make a slurry. Slowly pour this mixture into the simmering sauce while whisking. Continue to stir until the sauce thickens, creating a glossy finish. Final Step: Combine and Serve! Once the cauliflower is crispy and the sauce is beautifully thickened, toss the baked florets in the warm honey-garlic sauce until they’re well coated. Transfer them to a serving dish and garnish with sliced scallions for that extra flair. Serve them hot and enjoy the delightful burst of flavors! This Honey-Garlic Cauliflower is not just visually stunning but also outstanding in flavor, making it perfect for gatherings, a family feast, or all by yourself while binge-watching your favorite show. Each bite will remind you why it’s such a beloved recipe—it’s a tasty treat that brings joy to every occasion. Enjoy the wonderful blend of sweetness, savory notes, and a hint of spice, and get ready to be asked for this recipe again and again! This showstopping Honey-Garlic Cauliflower delivers restaurant-quality results using simple ingredients you probably already have at home. The perfect balance of textures and flavors creates an unforgettable dining experience that will have everyone asking for seconds. Picture-perfect presentation with vibrant colors makes this dish absolutely Instagram-worthy and guaranteed to impress any dinner guest. Incredibly versatile recipe that works beautifully for weeknight dinners, meal prep, special occasions, or even outdoor entertaining sessions. Perfecting Honey-Garlic Cauliflower Cooking Process Begin by preheating your oven while you prep your cauliflower florets and set up your breading station. Next, coat each floret in flour, eggs, and panko breadcrumbs before baking. Meanwhile, whip up your honey-garlic sauce, ensuring everything is ready at the same time. Add Your Touch to Honey-Garlic Cauliflower Get creative with your Honey-Garlic Cauliflower! Swap the honey for maple syrup for a vegan option or add a sprinkle of sesame seeds for an added crunch. You can also toss in some roasted peanuts for a nutty flavor. Storing & Reheating Honey-Garlic Cauliflower To store your Honey-Garlic Cauliflower, place it in an airtight container in the refrigerator for up to three days. When reheating, pop it in the oven for a few minutes to regain that crispy texture. There was that one time I brought this Honey-Garlic Cauliflower to a potluck, and before I knew it, the entire dish was gone! My friends raved about it, and one even asked if they could hire me as their personal chef. FAQs About Honey-Garlic Cauliflower What is Honey-Garlic Cauliflower? Honey-Garlic Cauliflower is a delightful vegetarian dish made with breaded cauliflower florets coated
Delicious Crockpot BBQ Chicken Wings Recipe for Effortless Entertaining
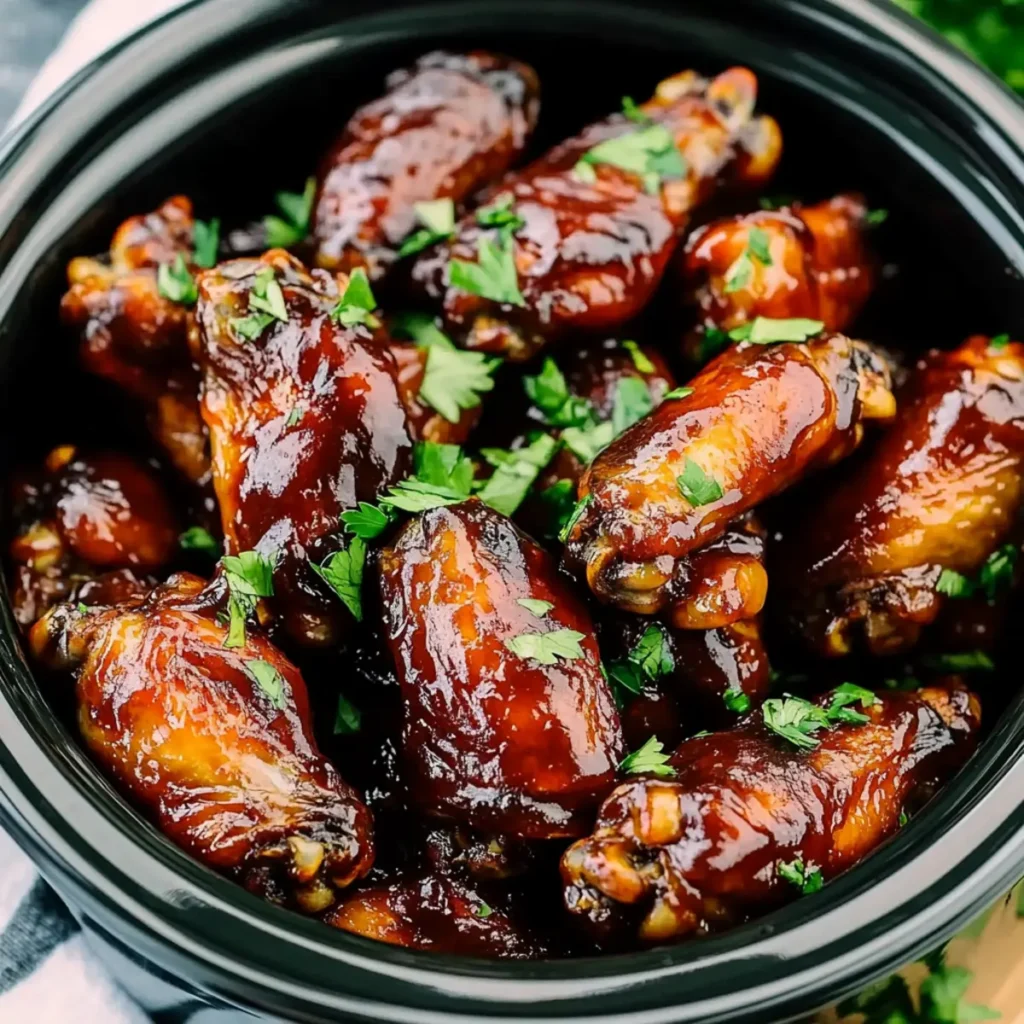
Imagine biting into a tender, smoky chicken wing, dripping with sweet and tangy BBQ sauce, fresh out of your crockpot. You know, that perfect dish that invites friends and family to gather around the table, their joyful chatter filling the air while you soak up all the glory for making such a delectable treat. This is exactly what our Delicious Crockpot BBQ Chicken Wings Recipe for Easy Entertaining serves up— a crowd-pleaser that makes you feel like a culinary rockstar without spending hours in the kitchen. These wings are not just a meal; they’re an experience, evoking memories of summer barbecues and game-day gatherings. The intoxicating aroma wafts through your home, teasing everyone’s senses and promising an explosion of flavors that will leave no plate untouched. You’ll find, whether it’s a cozy family dinner or a festive gathering with friends, they will be the highlight of any occasion. So, roll up your sleeves and get ready for a flavor journey that’s as easy as it is delightful. Ingredients for Delicious Crockpot BBQ Chicken Wings Recipe for Easy Entertaining Here’s what you’ll need to make this delicious Delicious Crockpot BBQ Chicken Wings Recipe for Easy Entertaining: 2.5 lbs Chicken Wings – Make sure to choose fresh or frozen raw chicken wings, cut into drums and flats or use drums only if you prefer. 3 tbsp BBQ Seasoning – Feel free to use your favorite store-bought seasoning or craft your own blend for a personal touch. 1 cup BBQ Sauce – Choose a thick, rich sauce; sweet, smoky, or spicy sauces work wonders for that perfect glaze. How to Make Delicious Crockpot BBQ Chicken Wings Recipe for Easy Entertaining Follow these simple steps to prepare this delicious Delicious Crockpot BBQ Chicken Wings Recipe for Easy Entertaining: Step 1: Prepare the Chicken Wings Begin by placing the raw chicken wings into your trusty crockpot. Make sure they are spread out evenly for uniform cooking, because nobody likes a clump of soggy chicken! Step 2: Season the Wings Sprinkle the BBQ seasoning generously over the wings. Toss them around a bit to ensure every wing gets that delicious coating. It’s like giving them a spa treatment, but way tastier! Step 3: Add the BBQ Sauce Pour that glorious BBQ sauce over your seasoned wings, covering them as entirely as possible. Who wouldn’t want a thick, sticky coating? It adds so much flavor, it’s like a warm hug in each bite. Step 4: Cover and Cook Put the lid on your crockpot and secure it well. Now, allow the magic to happen by cooking on low for 135 minutes, or until the wings are tender and practically falling off the bone. Step 5: Serve and Enjoy Once your kitchen smells like the best BBQ joint in town, it’s time to dig in! Serve those wings hot, maybe with some celery sticks and ranch on the side if you’re feeling fancy. Transfer to plates and drizzle with any leftover sauce for the perfect finishing touch. Feeling adventurous? If you want to add a twist, consider serving these wings with a variety of dipping sauces or even tossing them in a different flavor of sauce post-cooking for an extra hit of zest. Enjoy your effortless entertaining and watch as your guests come back for seconds (or thirds!). Trust me; they won’t be able to resist. Now that you have the secrets to crafting these Delicious Crockpot BBQ Chicken Wings Recipe for Easy Entertaining, go ahead and impress your friends and family while making memories together. Remember, cooking should always be a joyful experience, so don’t be afraid to throw in some of your own flair into this recipe! Happy cooking! This showstopping Delicious Crockpot BBQ Chicken Wings Recipe for Easy Entertaining delivers restaurant-quality results using simple ingredients you probably already have at home. The perfect balance of textures and flavors creates an unforgettable dining experience that will have everyone asking for seconds. Picture-perfect presentation with vibrant colors makes this dish absolutely Instagram-worthy and guaranteed to impress any dinner guest. Incredibly versatile recipe that works beautifully for weeknight dinners, meal prep, special occasions, or even outdoor entertaining sessions. Perfecting Delicious Crockpot BBQ Chicken Wings Recipe for Easy Entertaining Cooking Process To achieve the best results, start by seasoning the wings well before placing them in the crockpot. After that, pour the BBQ sauce over and allow the flavors to meld while gently cooking them on low for a beautifully tender finish. Add Your Touch to Delicious Crockpot BBQ Chicken Wings Recipe for Easy Entertaining Feel free to swap the BBQ seasoning for your favorite dry rub or add a splash of hot sauce for a spicy kick. You could also incorporate honey for a touch of sweetness or toss in a few garlic cloves to elevate the flavor. Storing & Reheating Delicious Crockpot BBQ Chicken Wings Recipe for Easy Entertaining Store any leftover wings in an airtight container in the refrigerator for up to three days. When reheating, simply use the microwave or return them to the crockpot on low until warmed through to keep them tender. Sharing this recipe reminds me of the first time I made BBQ wings for a gathering. The rave reviews from friends made me feel like a culinary rock star, and their smiles alone were worth every minute spent in the kitchen. FAQs About Delicious Crockpot BBQ Chicken Wings Recipe for Easy Entertaining What is Delicious Crockpot BBQ Chicken Wings Recipe for Easy Entertaining? The Delicious Crockpot BBQ Chicken Wings Recipe for Easy Entertaining is an effortless way to create mouthwatering chicken wings that are perfect for any gathering. Utilizing just a few simple ingredients, including chicken wings, BBQ seasoning, and BBQ sauce, this recipe allows for a hands-off cooking experience in a crockpot. The result is tender and flavorful wings that will impress your guests without requiring hours spent in the kitchen. Whether you are hosting a party or simply craving a delicious meal, this recipe is designed for effortless