
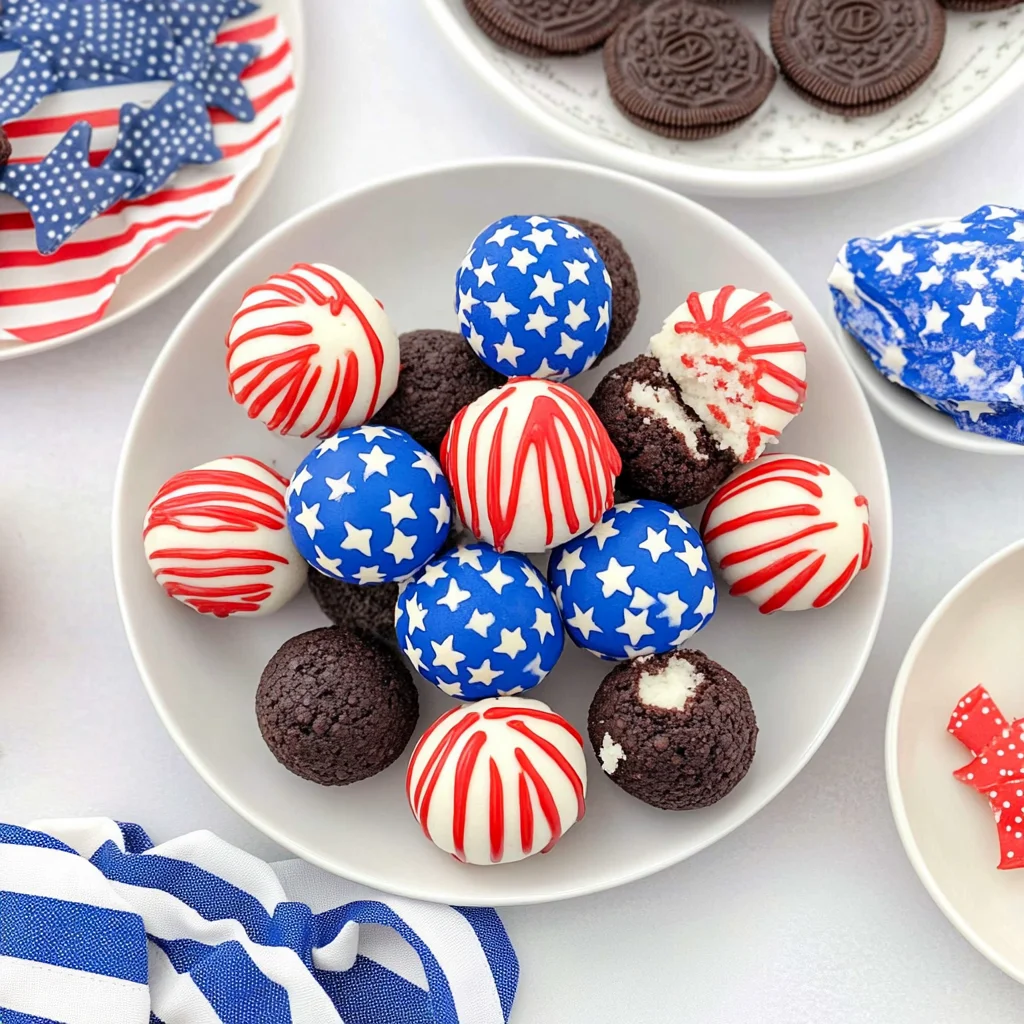
Imagine biting into a creamy, sweet explosion of flavors as the chill of white chocolate meets the crunch of Oreo crumbles. These 4th of July Oreo Balls are not just a treat; they’re a celebration waiting to happen, with each bite transporting you to sun-soaked picnics and fireworks lighting up the night sky.
As I recall my childhood 4th of July gatherings, the laughter of friends and family mingled with the irresistible aroma of festive treats. These delightful Oreo balls, rolled in white chocolate and sprinkled with red, white, and blue magic, have always been the highlight on our dessert table. Get ready for a flavor experience that will make your taste buds dance and leave everyone asking for more!
Why Does Everyone Love 4th of July Oreo Balls?
Irresistible flavor: The combination of crushed Oreo cookies and softened cream cheese creates a rich, indulgent filling that everyone craves.
Festive appeal: Coated in smooth white chocolate and decorated with vibrant red and blue sprinkles, these treats are as beautiful as they are delicious, making them perfect for celebrations!
Quick to make: With just 30 minutes of prep time, you can whip up a batch that will impress your guests without spending all day in the kitchen.
Crowd-pleaser: These bite-sized delights are sure to be a hit at any gathering, delighting both kids and adults alike—no one can resist that creamy, crunchy goodness!
4th of July Oreo Balls Ingredients
- For the Oreo Mixture
- 1 package Oreo cookies (Crushed) – The base of these delightful treats, providing a rich chocolate flavor and crunchy texture.
- 8 oz cream cheese (Softened) – Ensures a smooth and creamy consistency that binds the crushed Oreos together perfectly.
- For the Coating
- 12 oz white chocolate (Chopped or chips) – Adds a sweet, creamy layer that beautifully contrasts with the rich Oreo center.
- 1 tbsp red sprinkles (For decoration) – Provides a festive touch, making your 4th of July Oreo Balls pop with color!
- 1 tbsp blue sprinkles (For decoration) – Complements the red sprinkles for a patriotic look that’s perfect for Independence Day celebrations.
How to Make 4th of July Oreo Balls
1. Combine Ingredients: In a mixing bowl, combine 1 package of crushed Oreo cookies with 8 oz of softened cream cheese. Mix until the mixture is smooth and well combined, creating a delightful, cookie-infused blend.
2. Form Balls: Using your hands, form the mixture into small balls, about 1 inch in diameter. Place these festive treats on a baking sheet lined with parchment paper, ready for chilling.
3. Chill: Refrigerate the balls for about 30 minutes to firm up nicely. This step is crucial for achieving that perfect texture before coating them in chocolate.
4. Melt Chocolate: In a microwave-safe bowl, melt 12 oz of chopped white chocolate or chips in 30-second intervals. Stir between intervals until smooth and creamy—this will be your delicious coating.
5. Coat Oreo Balls: Dip each chilled Oreo ball into the melted white chocolate using a fork. Allow excess chocolate to drip off before returning them to the parchment-lined baking sheet for an even coating.
6. Decorate: While the chocolate is still wet, sprinkle 1 tbsp of red and 1 tbsp of blue sprinkles on top for a festive touch that celebrates Independence Day beautifully.
7. Set: Allow the coated balls to set at room temperature or refrigerate for an additional 15 minutes until the chocolate hardens and glistens perfectly.
Optional: For an extra festive flair, consider adding edible glitter on top before serving!
Exact quantities are listed in the recipe card below.
Expert Tips
- Cream Cheese Softness: Ensure your cream cheese is fully softened for easy mixing; this helps achieve a smooth Oreo mixture without lumps.
- Proper Chilling: Don’t skip the chilling step! Refrigerating the balls for 30 minutes helps them hold their shape during coating.
- Chocolate Melting: Melt white chocolate gently in 30-second intervals to avoid scorching; overcooked chocolate can become grainy and unusable.
- Coating Technique: Use a fork to dip Oreo balls into melted chocolate, allowing excess to drip off. This prevents clumps and ensures an even coat.
- Decorate Quickly: Apply red and blue sprinkles right after coating while the chocolate is still wet; this allows the sprinkles to adhere perfectly to your festive 4th of July Oreo Balls.
How to Store and Freeze 4th of July Oreo Balls
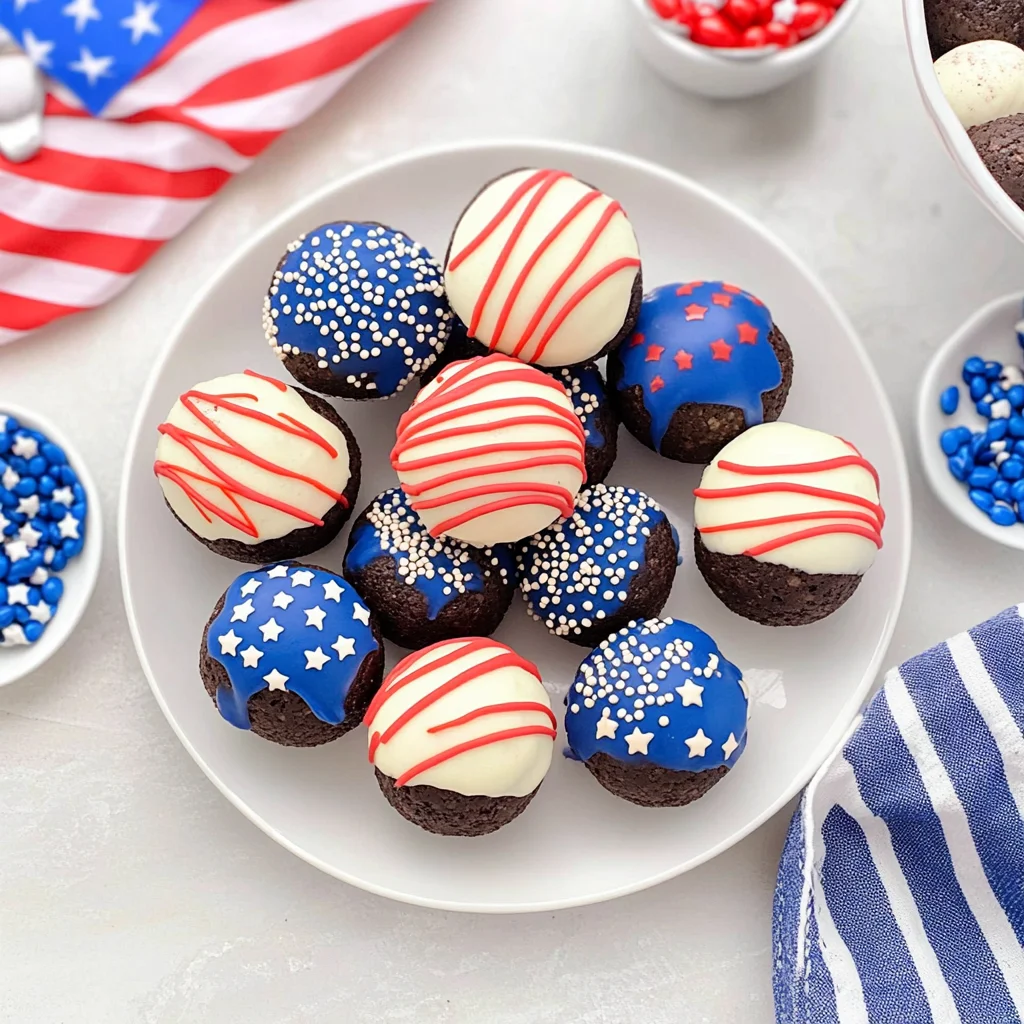
- Fridge: Keep your 4th of July Oreo Balls in an airtight container for up to 1 week to preserve their creamy texture and flavor.
- Freezer: For longer storage, freeze the Oreo balls in a single layer on a baking sheet, then transfer to a sealed bag for up to 3 months.
- Thawing: To enjoy frozen Oreo balls, simply move them to the fridge overnight before serving. This keeps them from becoming too soft.
- Room Temperature: If serving at a gathering, they can be left out for up to 2 hours, but be sure to return any leftovers to the fridge after.
4th of July Oreo Balls Your Way
Feel free to get creative with this delightful treat and make it your own!
- Peanut Butter: Mix in ½ cup of peanut butter with the cream cheese for a nutty twist. The rich, creamy flavor will elevate your Oreo balls to new heights and bring a satisfying crunch when coated in chocolate.
- Minty Fresh: Add ½ teaspoon of peppermint extract to the cream cheese mixture for a refreshing flavor. This minty variation pairs beautifully with the sweetness of white chocolate, creating a festive and invigorating dessert.
- Chocolate Lovers: Substitute regular Oreos with mint or chocolate crème Oreos for an extra chocolaty experience. This twist deepens the flavor profile, making each bite even more indulgent.
- Vegan Delight: Use vegan cream cheese and dairy-free white chocolate chips for a plant-based version. These substitutions keep the festive spirit alive while catering to dietary preferences without sacrificing taste.
- Nutty Crunch: Stir in ¼ cup chopped nuts, like walnuts or almonds, into the Oreo mixture. The added crunch provides texture and a delightful contrast to the smoothness of the filling.
- Fruity Fun: Fold in ¼ cup finely chopped strawberries or raspberries into the mixture for a burst of fruity flavor. This bright addition not only enhances taste but also gives your treats a pop of color that’s perfect for celebrations.
- Spicy Kick: Add a pinch of cayenne pepper to the white chocolate coating for a surprising heat. This unexpected twist will delight adventurous palates looking for something different during their Independence Day festivities.
Make Ahead Options
If you’re looking to save time while preparing for your 4th of July celebration, these 4th of July Oreo Balls are perfect for meal prep. You can prepare the Oreo mixture ahead of time by combining 1 package of crushed Oreo cookies with 8 oz of softened cream cheese; mix until well combined, and then form into balls. Place them on a parchment-lined baking sheet and chill for about 30 minutes. You can also melt the 12 oz of white chocolate up to a day in advance and store it in an airtight container at room temperature. When you’re ready to serve, simply dip the chilled Oreo balls into the melted chocolate, decorate with red and blue sprinkles, and let them set. These steps will keep your delicious treats fresh for up to 3 days in the fridge, ensuring that your festive dessert remains a crowd-pleaser without any last-minute stress!
4th of July Oreo Balls Recipe FAQs
What type of Oreo cookies should I use for the Oreo balls?
You can use any flavor of Oreo cookies that you love! Classic chocolate Oreos are the most popular choice, but feel free to experiment with seasonal flavors like red velvet or pumpkin spice if they’re available. Just remember, the cream cheese and chocolate coating will complement whatever flavor you choose.
How long can I store the finished Oreo balls?
These delightful treats can be stored in an airtight container in the refrigerator for up to one week. If you’re planning to make them ahead of time for a gathering, this makes them a perfect option! Just ensure they are completely set before storing to avoid any mess.
Can I freeze the Oreo balls for later enjoyment?
Absolutely! You can freeze these festive 4th of July Oreo balls for up to three months. To do so, place them in a single layer on a baking sheet until frozen solid, then transfer them to a freezer-safe container. When you’re ready to enjoy them, simply let them thaw in the fridge for a couple of hours.
What should I do if my white chocolate isn’t melting smoothly?
If your white chocolate is clumping or not melting well, try adding a small amount of vegetable oil (about 1 teaspoon) to help it smooth out while stirring. Remember to melt it in short 30-second intervals and stir frequently; this will prevent overheating and ensure a silky coating for your Oreo balls.
How many servings does this recipe yield?
This recipe makes about 4 indulgent servings, with each serving containing approximately 150 calories. If you’re expecting a crowd for your Independence Day celebration, consider doubling or even tripling the recipe so everyone can enjoy these sweet treats!
Can I use alternative decorations instead of red and blue sprinkles?
Certainly! While red and blue sprinkles add a festive touch perfect for the Fourth of July, you can use any color or type of sprinkles you have on hand. Crushed nuts or edible glitter would also make fun alternatives. Just make sure to add them while the chocolate coating is still wet so they stick beautifully!
4th of July Oreo Balls
Ingredients
Method
- In a mixing bowl, combine crushed Oreo cookies and softened cream cheese. Mix until well combined.
- Using your hands, form the mixture into small balls, about 1 inch in diameter, and place them on a baking sheet lined with parchment paper.
- Refrigerate the balls for about 30 minutes to firm up.
- In a microwave-safe bowl, melt the white chocolate in 30-second intervals, stirring in between until smooth.
- Dip each chilled Oreo ball into the melted white chocolate using a fork, allowing excess chocolate to drip off.
- Return the coated balls to the parchment-lined baking sheet.
- While the chocolate is still wet, sprinkle red and blue sprinkles on top for decoration.
- Allow the chocolate to set at room temperature or refrigerate for an additional 15 minutes.